
This post contains affiliate links. Thank you for supporting Beneficial Bento!
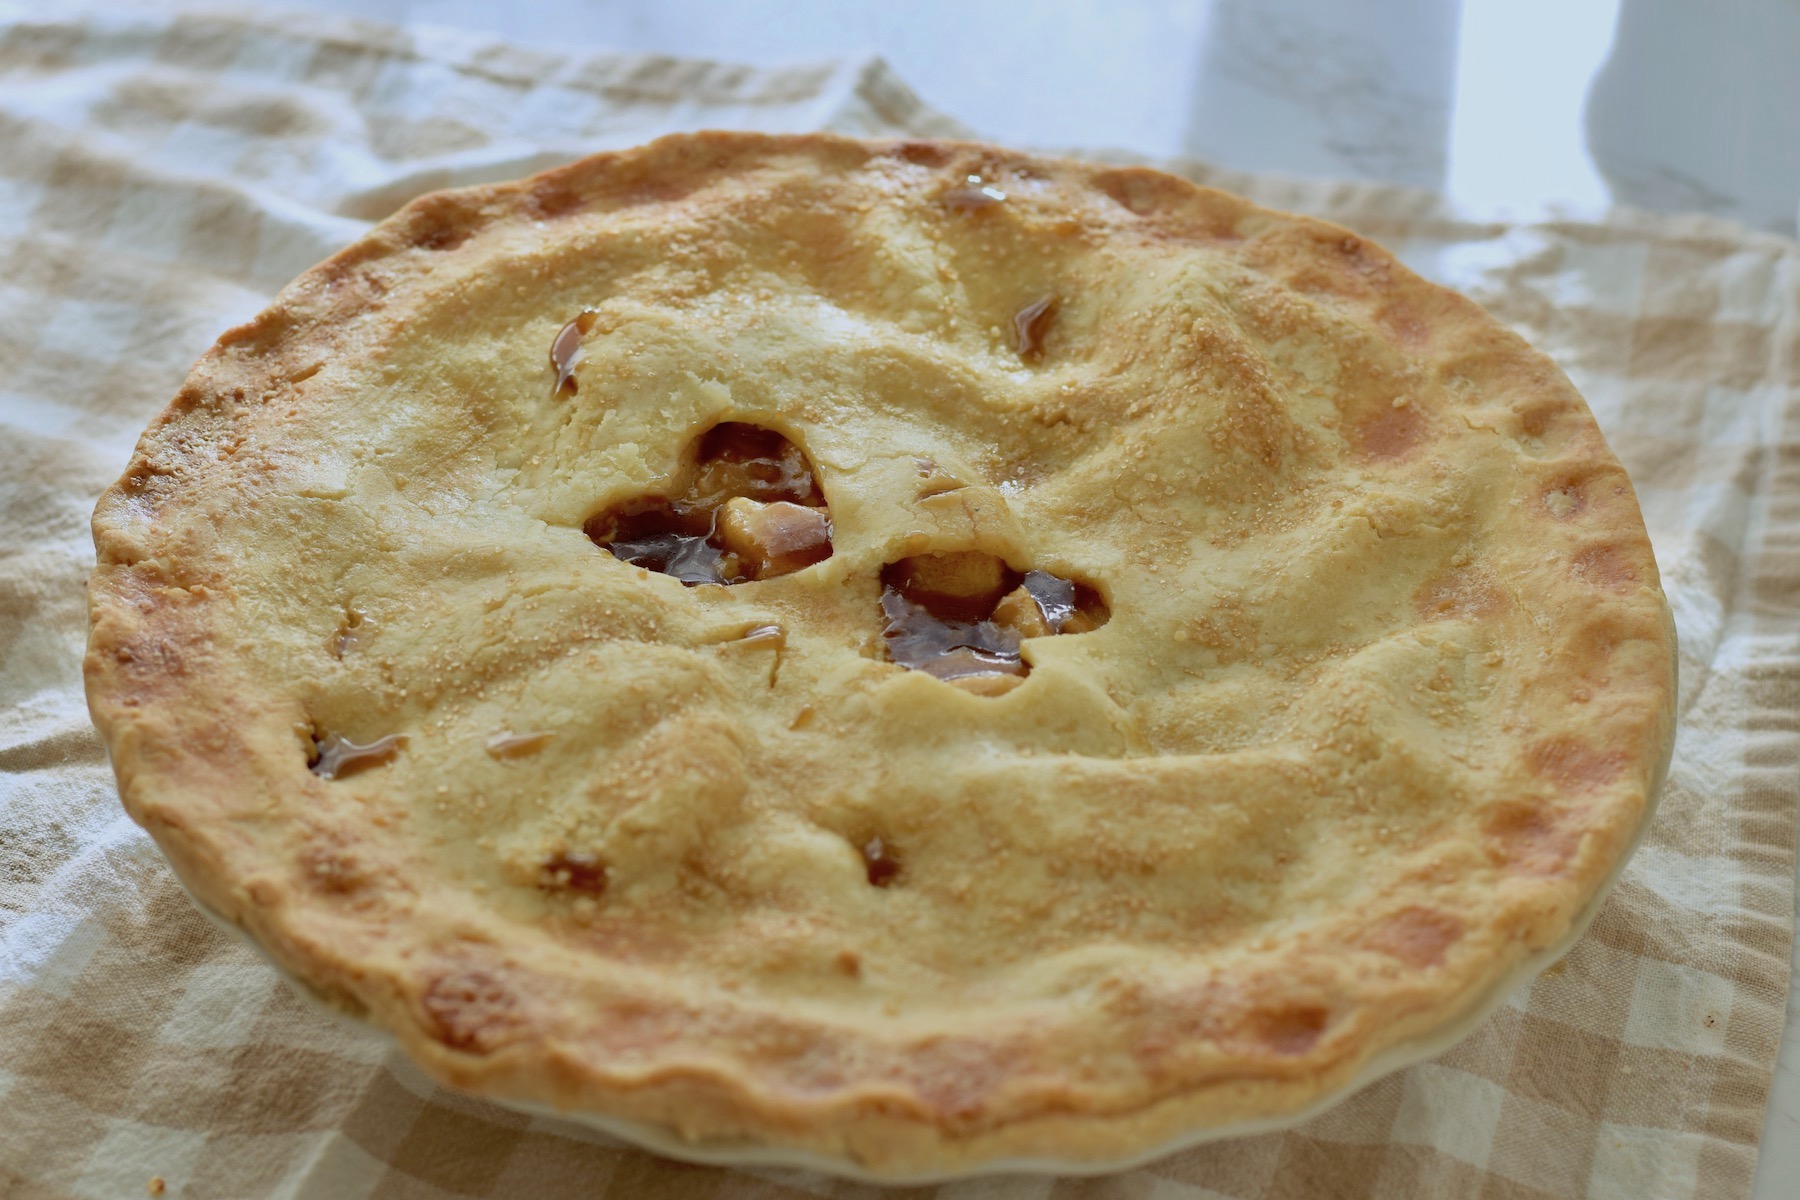
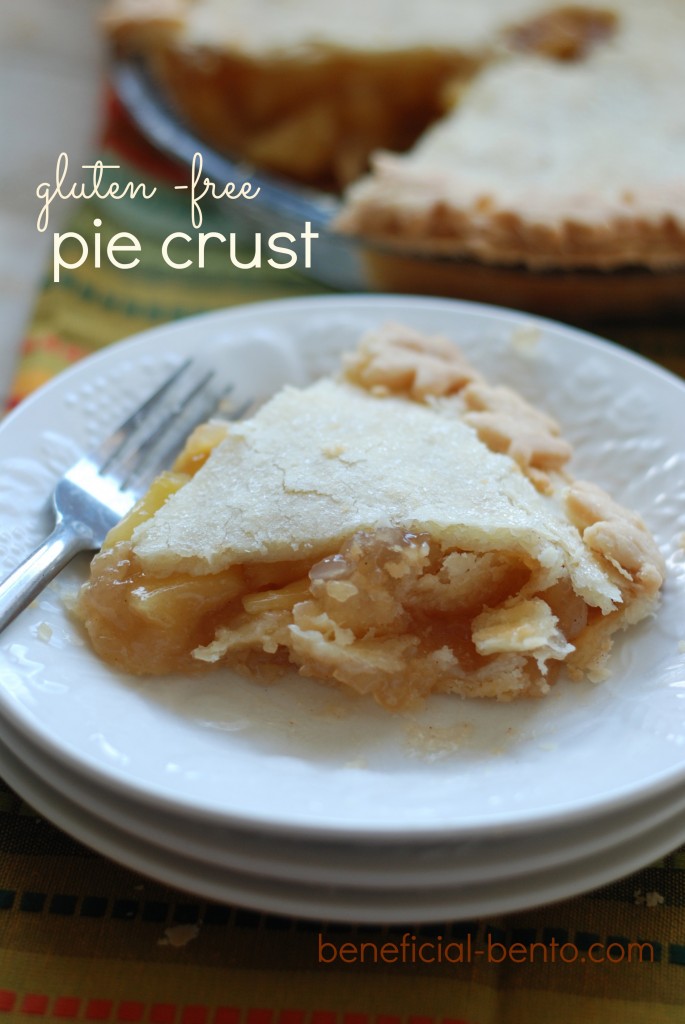
Homemade gluten free pie crust can be flaky, sweet, and absolutely melt in your mouth. It often tastes even better than regular pie crust made with wheat flour!
But the biggest problem many of us have is a dry, crumbly crust. A delicious crumbly crust, but still - it's frustrating. I have been baking gluten free for about 20 years now, and over time I've developed a perfect gluten free pie crust that not only tastes heavenly, it does not crumble into dust. You can roll it, crimp it, and cut it and it bakes up perfectly without the shape getting distorted as it bakes.
Gluten free homemade pie crust is one of my most requested recipes, so now I'm opening the vault to share this special recipe with you.
Why This is the Best Gluten Free Pie Crust
- Simple: You can make this by hand in a bowl (just basic tools needed) or in a food processor which will save you a lot of time.
- Easy for all skill levels: Whether this is your first time making pie crust or if you've
- been baking for a long time, this tutorial is just right for you! Follow along with the step-by-step photos, instructions, and tips in this post and you'll soon be making the best gluten-free pie crust you've ever had. More tips and gluten free baking knowledge in this post: "Best Beginner's Tips for Successful Gluten Free Baking"
- The taste is amazing!: This is an all butter recipe and it tastes like it! It's so tender and flaky, and not at all gritty. It compliments any pie recipe.
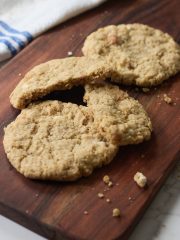
- Versatile: My flaky pie crust is the best thing to use for sweet pies (like apple pie), or savory pies (like chicken pot pie). Since it's so easy to roll out and shape, it works for hand pies and even homemade pop tarts.
Simple Ingredients Make the Best Gluten-Free Pie Crust
Dry Ingredients
- Sweet rice flour - also called glutinous rice flour (even though there is no gluten in it). This flour has almost a gummy quality to it. I use it in so many gluten free baked goods, like cake and bread. It's essential for pie crust.
- White rice flour - you could also use finely ground brown rice flour if you prefer.
- Corn flour - this is not cornstarch or cornmeal. Corn flour is also called masa, which is a fine flour (not coarse like cornmeal). It's what you use to make tamales.
- Tapioca starch - also called tapioca flour, it imparts a chewy quality to gluten free baked goods and helps hold them together.
- Xanthan gum - this is a binder, and it takes the place of gluten in baked goods. Without it pie crust would be very powdery and hard to roll out.
- Granulated sugar - this helps the crust to brown. Gluten free flours are notorious for not browning as easily as wheat flour, and sugar is one of the ingredients that helps with that.
- Salt - adds just the right touch of flavor.
Other Ingredients
- Cold butter - I used salted butter, but you could also use unsalted if you prefer. The most important thing is to keep the butter very, very cold!
- Egg - I use one large egg for my pie crust. Egg is another good binder in gluten free baking.
- Vinegar - apple cider vinegar is what I use but I don't think it matters much if you were to use white vinegar. A little bit of vinegar in pie crust will be like some extra insurance against overworking the dough - it keeps it tender. It also prevents pie crust from turning gray (that can happen!).
- Cream - Cream or whole milk (or even non-dairy substitutes)make a tender and sweet pie crust. See the yellow box below for dairy free subs.
- Ice cold water - the coldest water you can get. TIP: Put ice cubes in a little bowl of water and keep it near you as you make the dough.
Tools You Need
Traditional Method (by hand)
- Large bowl
- Box grater
- whisk
- Rolling pin
- Parchment paper, plastic wrap, or waxed paper
- Pie pan
Food Processor Method
- Food processor with a grating wheel, and standard blade attachment
- Rolling pin
- Parchment paper, plastic wrap, or waxed paper
- Pie pan
Dairy-Free Option
You can make this pie crust dairy free by swapping the butter for a vegan butter like Earth Balance buttery spread. Another good one is Country Crock Plant butter sticks - which are easier to shred with a box grater.
And you can easily replace the cream with a non-dairy milk such as cashew milk or coconut milk.
Here's How You Make Gluten-Free Pie Dough
Traditional Method
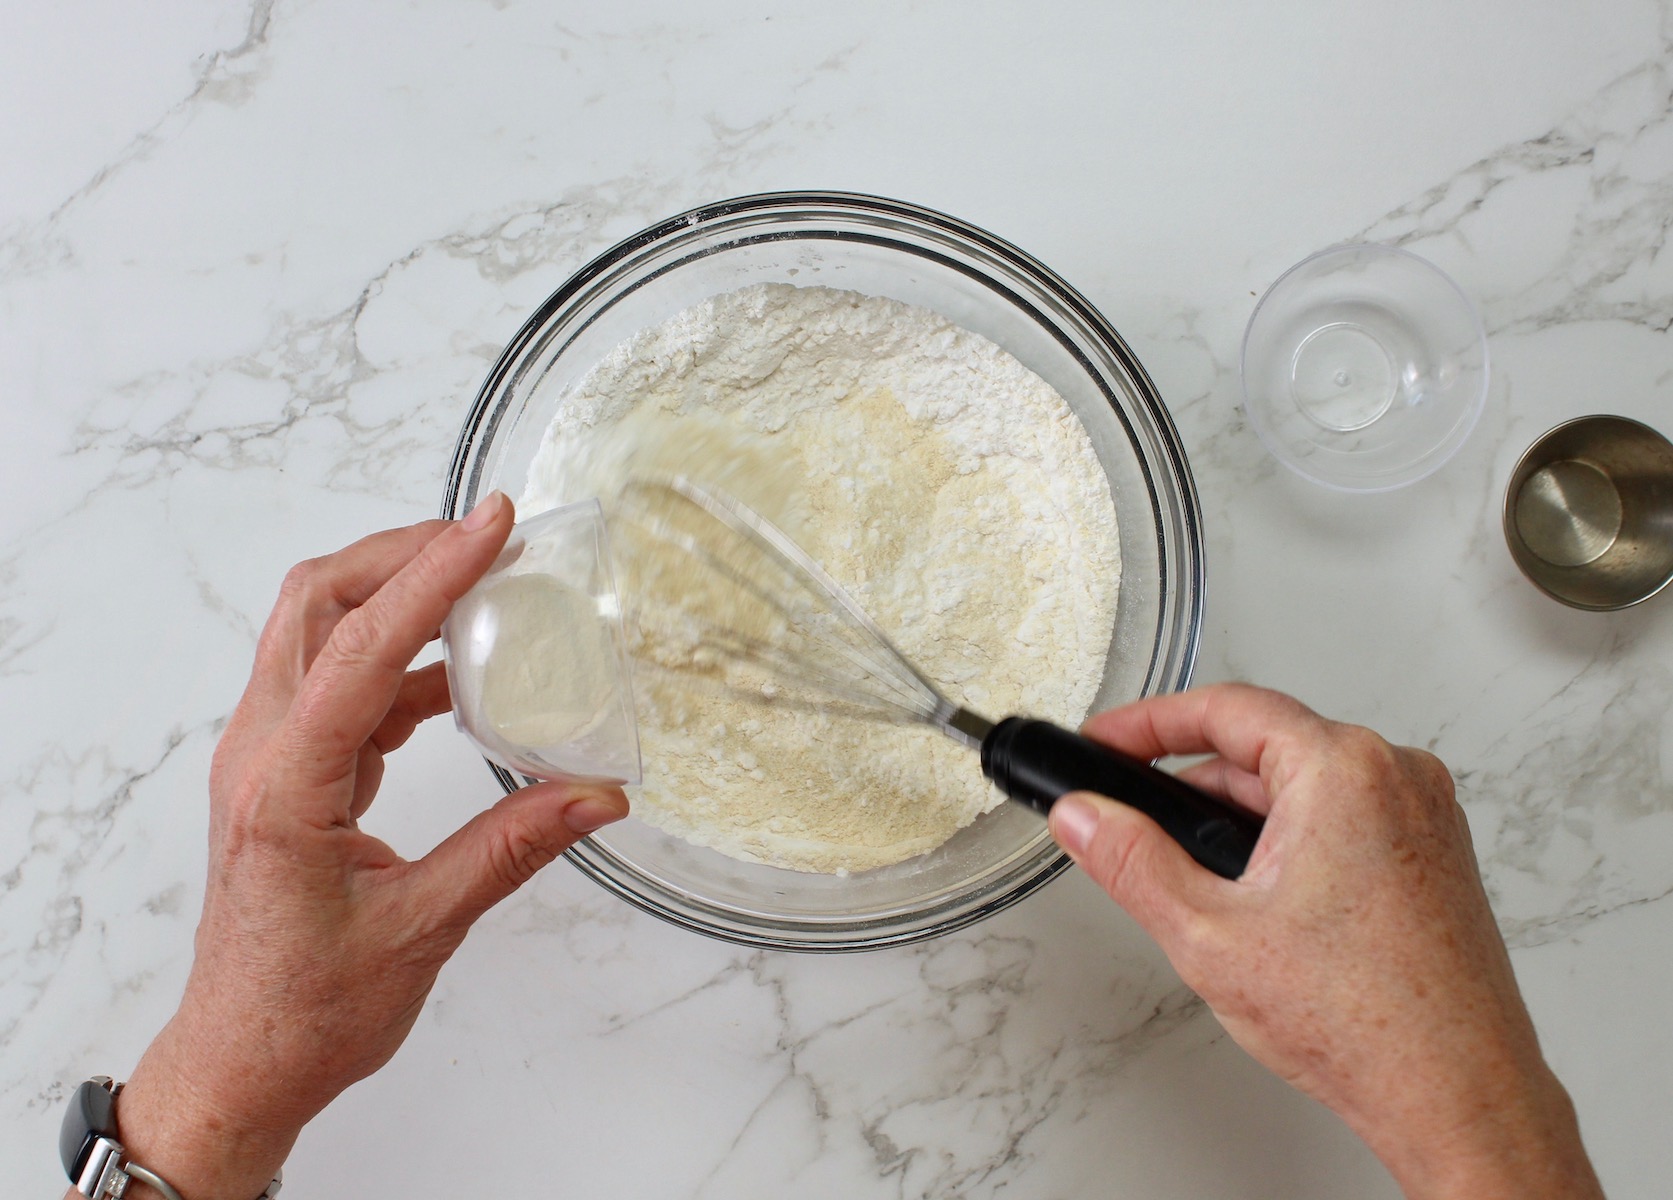
Step 1. Combine flours, sugar, xanthan gum, and salt. Whisk well.
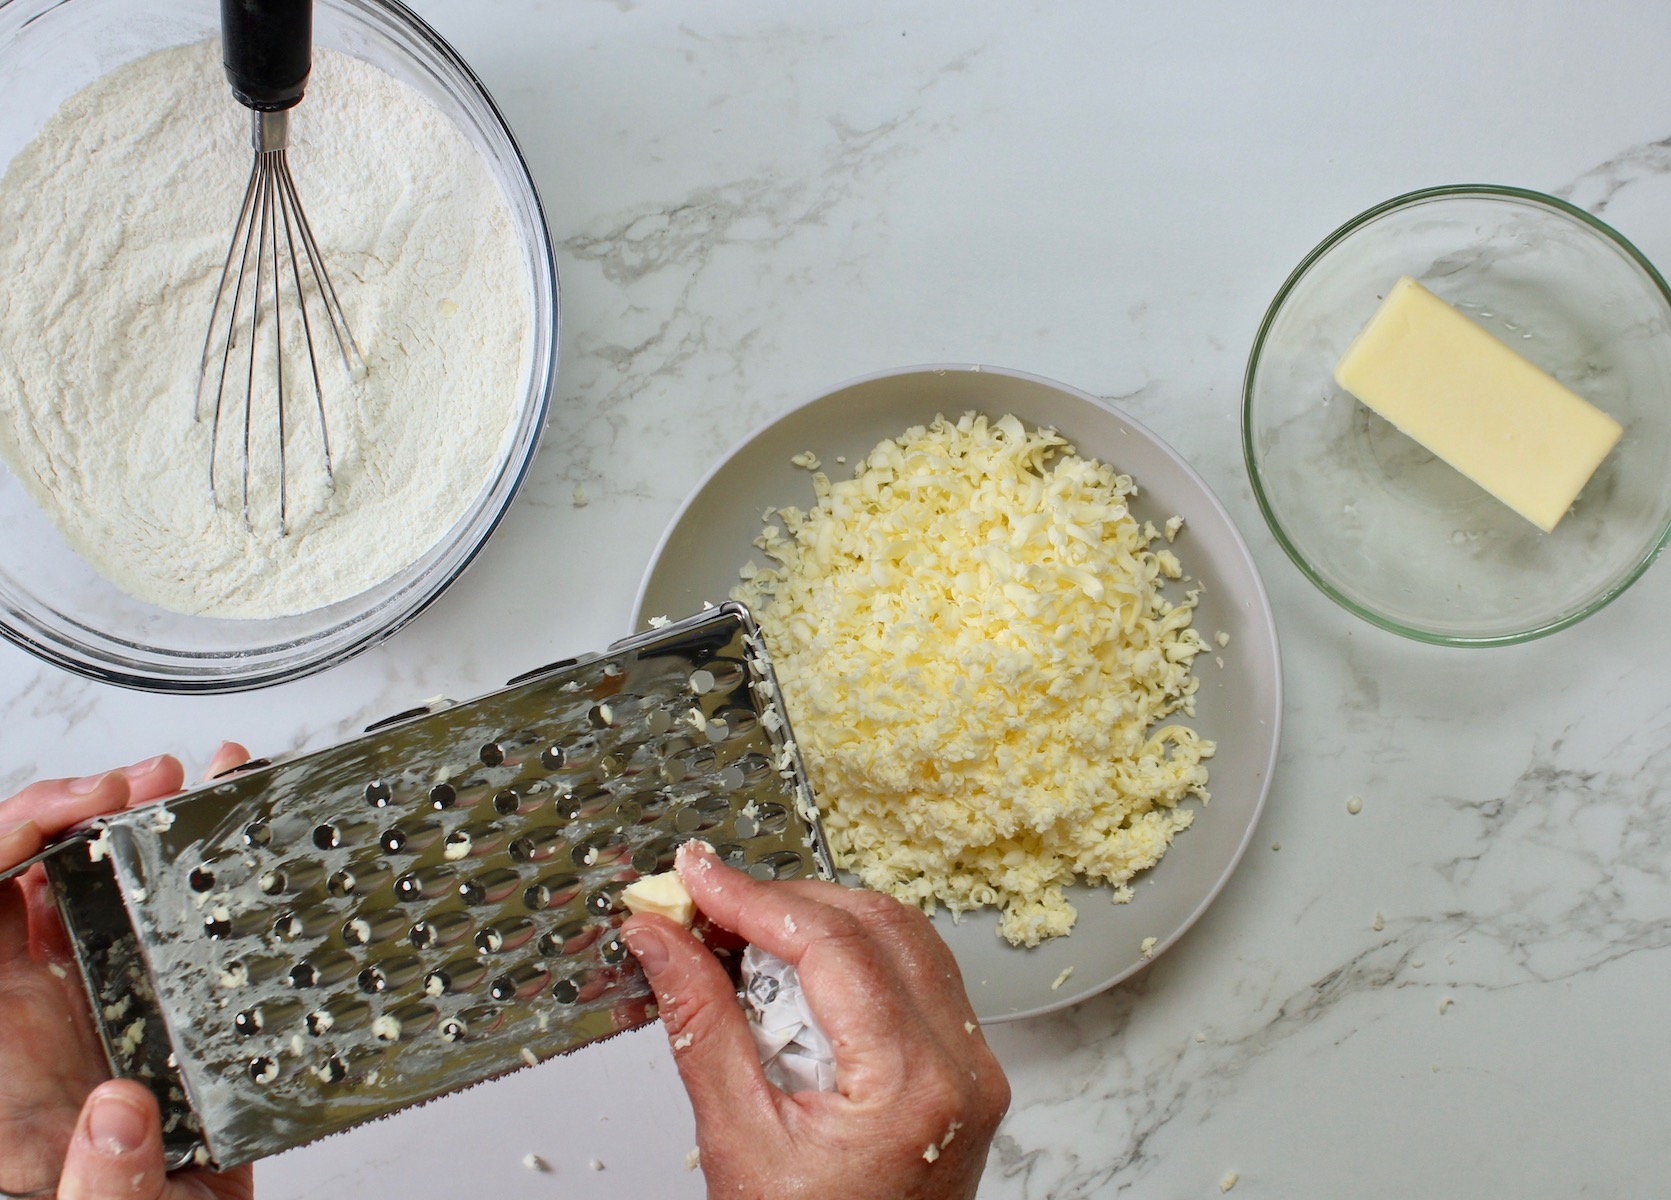
Step 2. Grate the cold butter into the flour mixture (see recipe card for details.
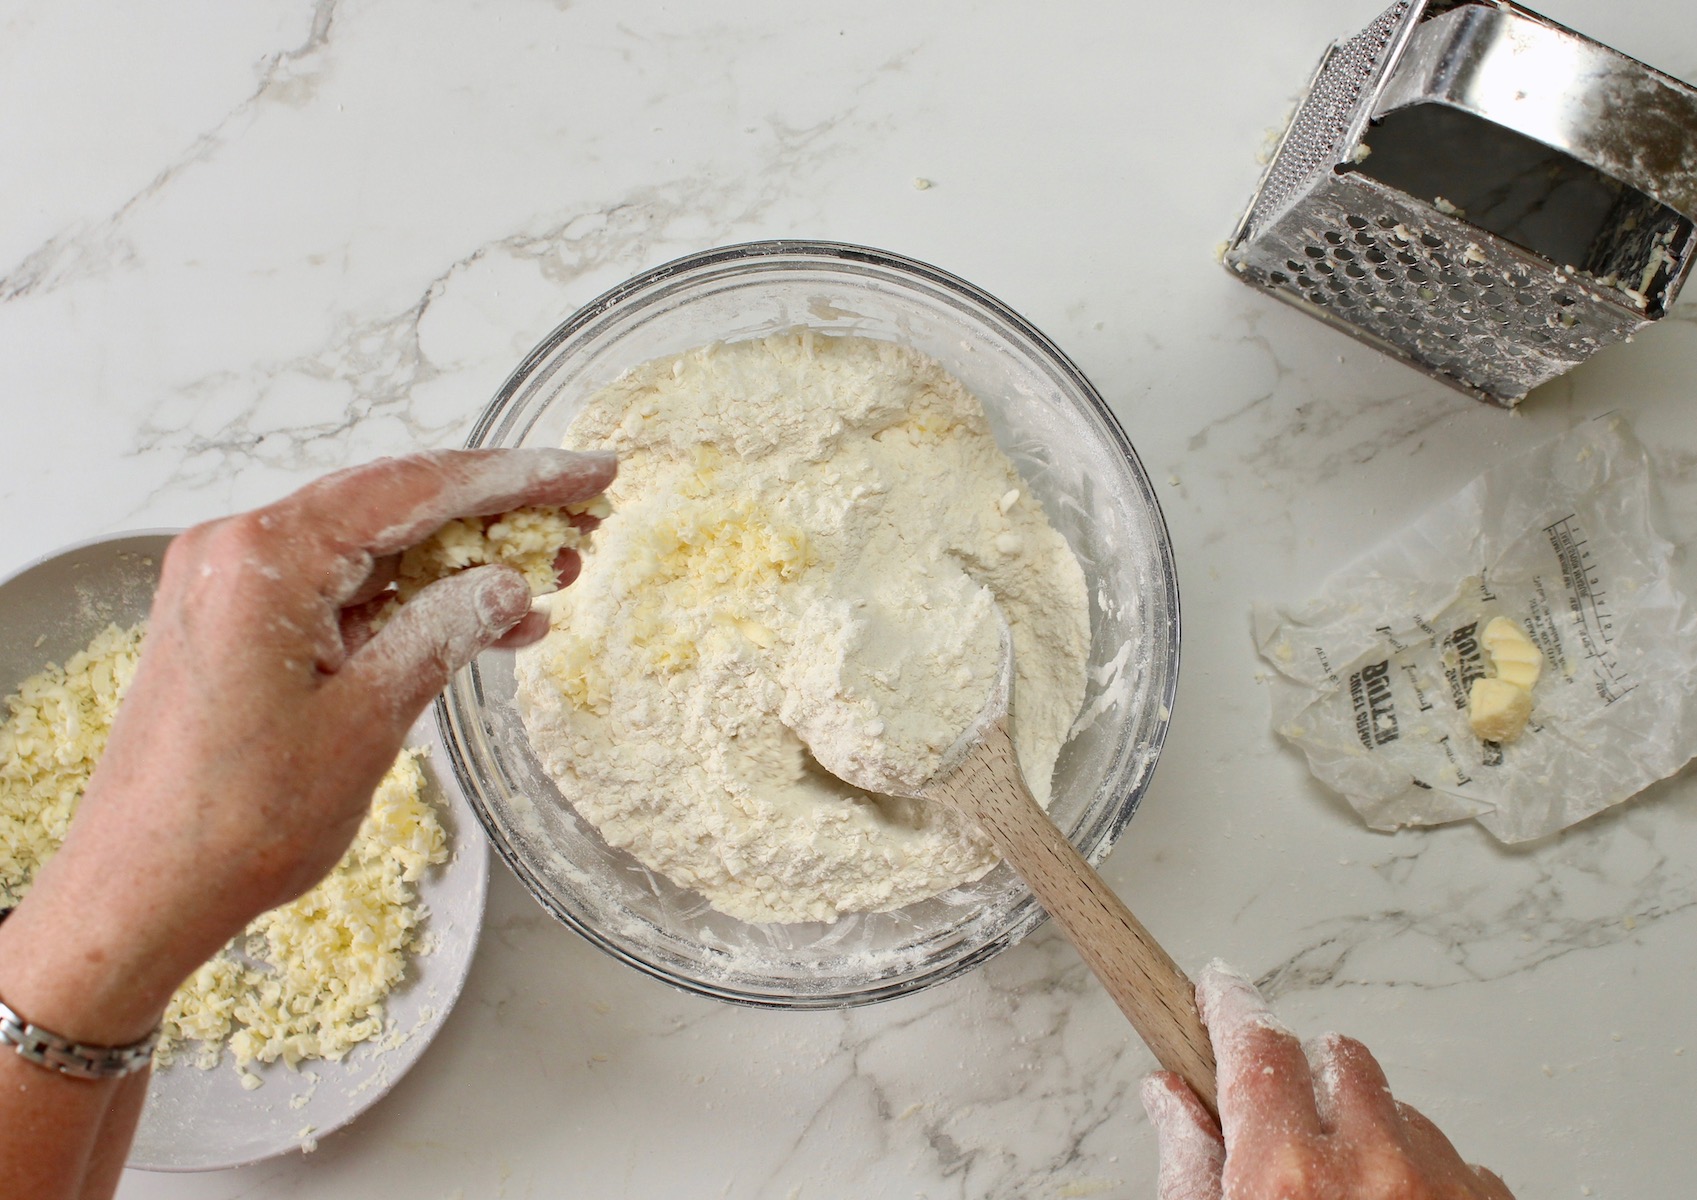
Step 3. Toss butter into the flour mixture, as described in the recipe card below.
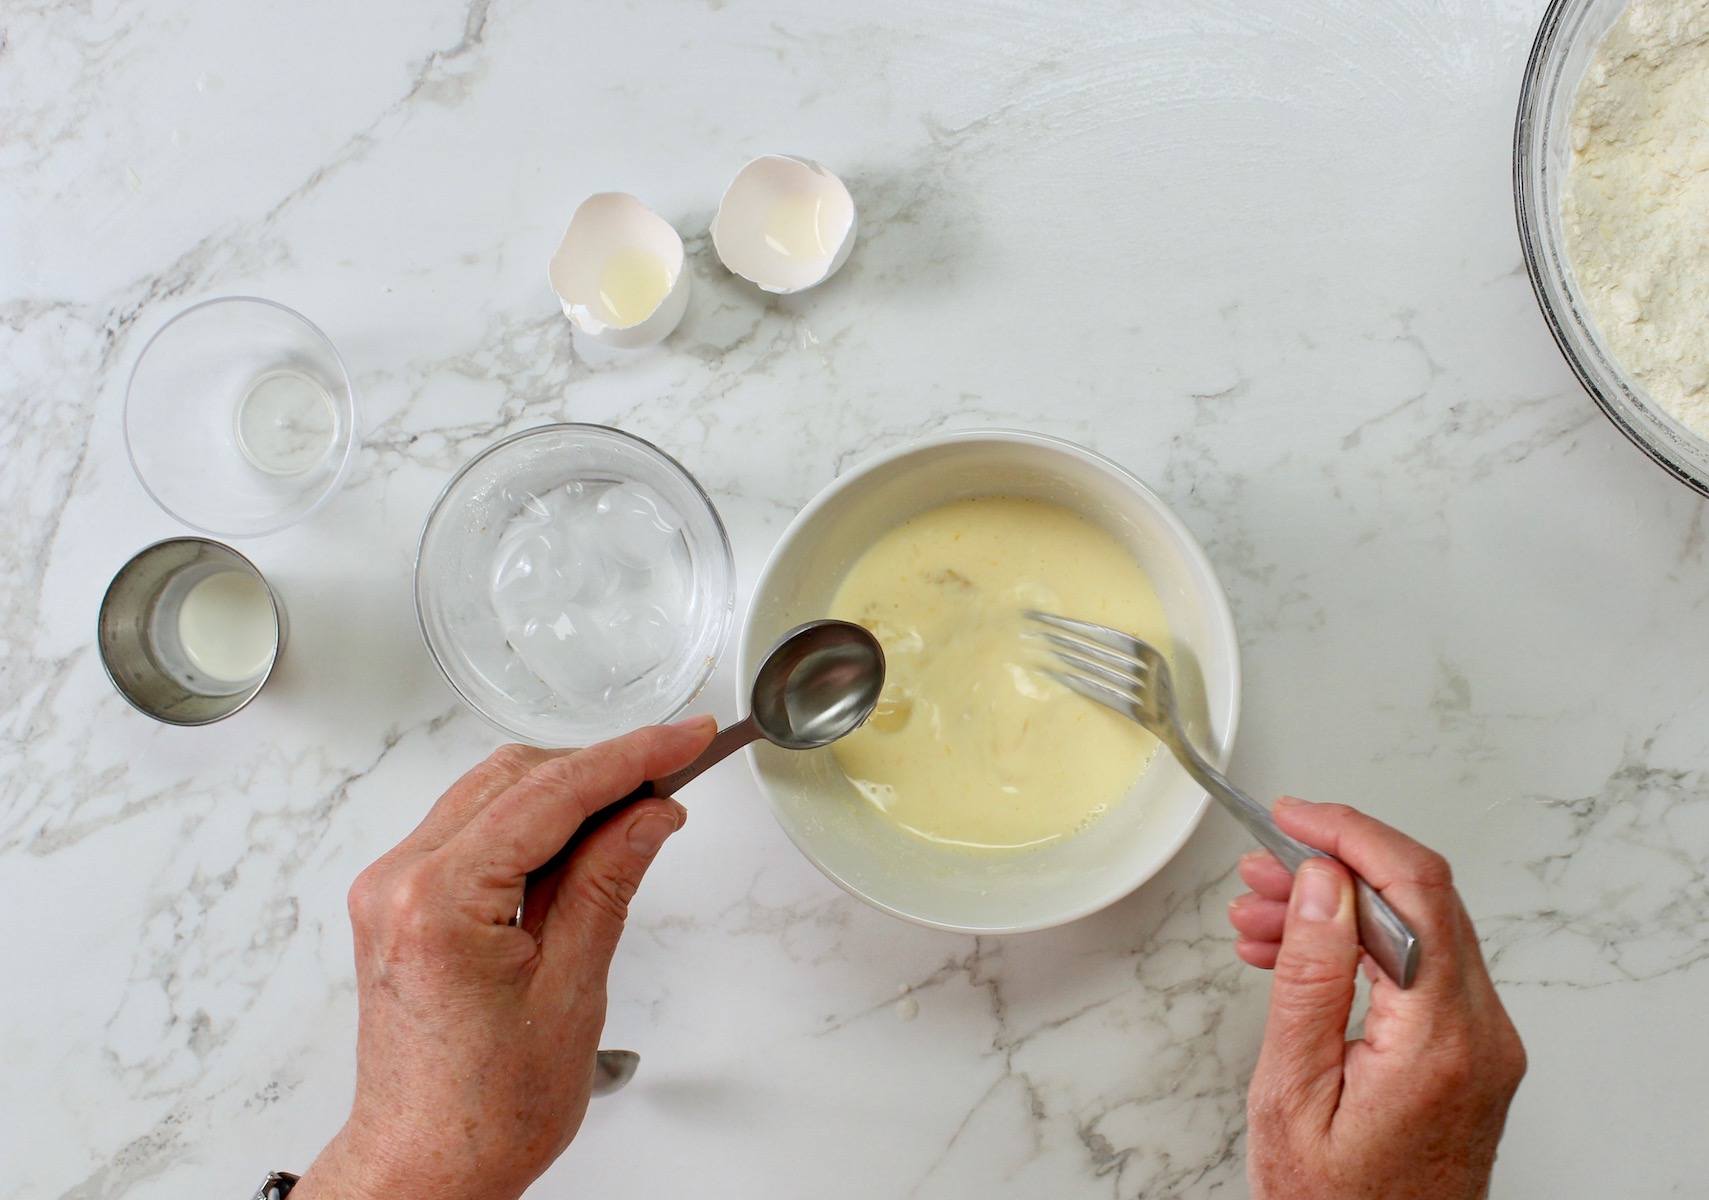
Step 4. Mix the egg, vinegar, cream, and 3 tablespoons of ice water. Add to the flour/butter mixture.
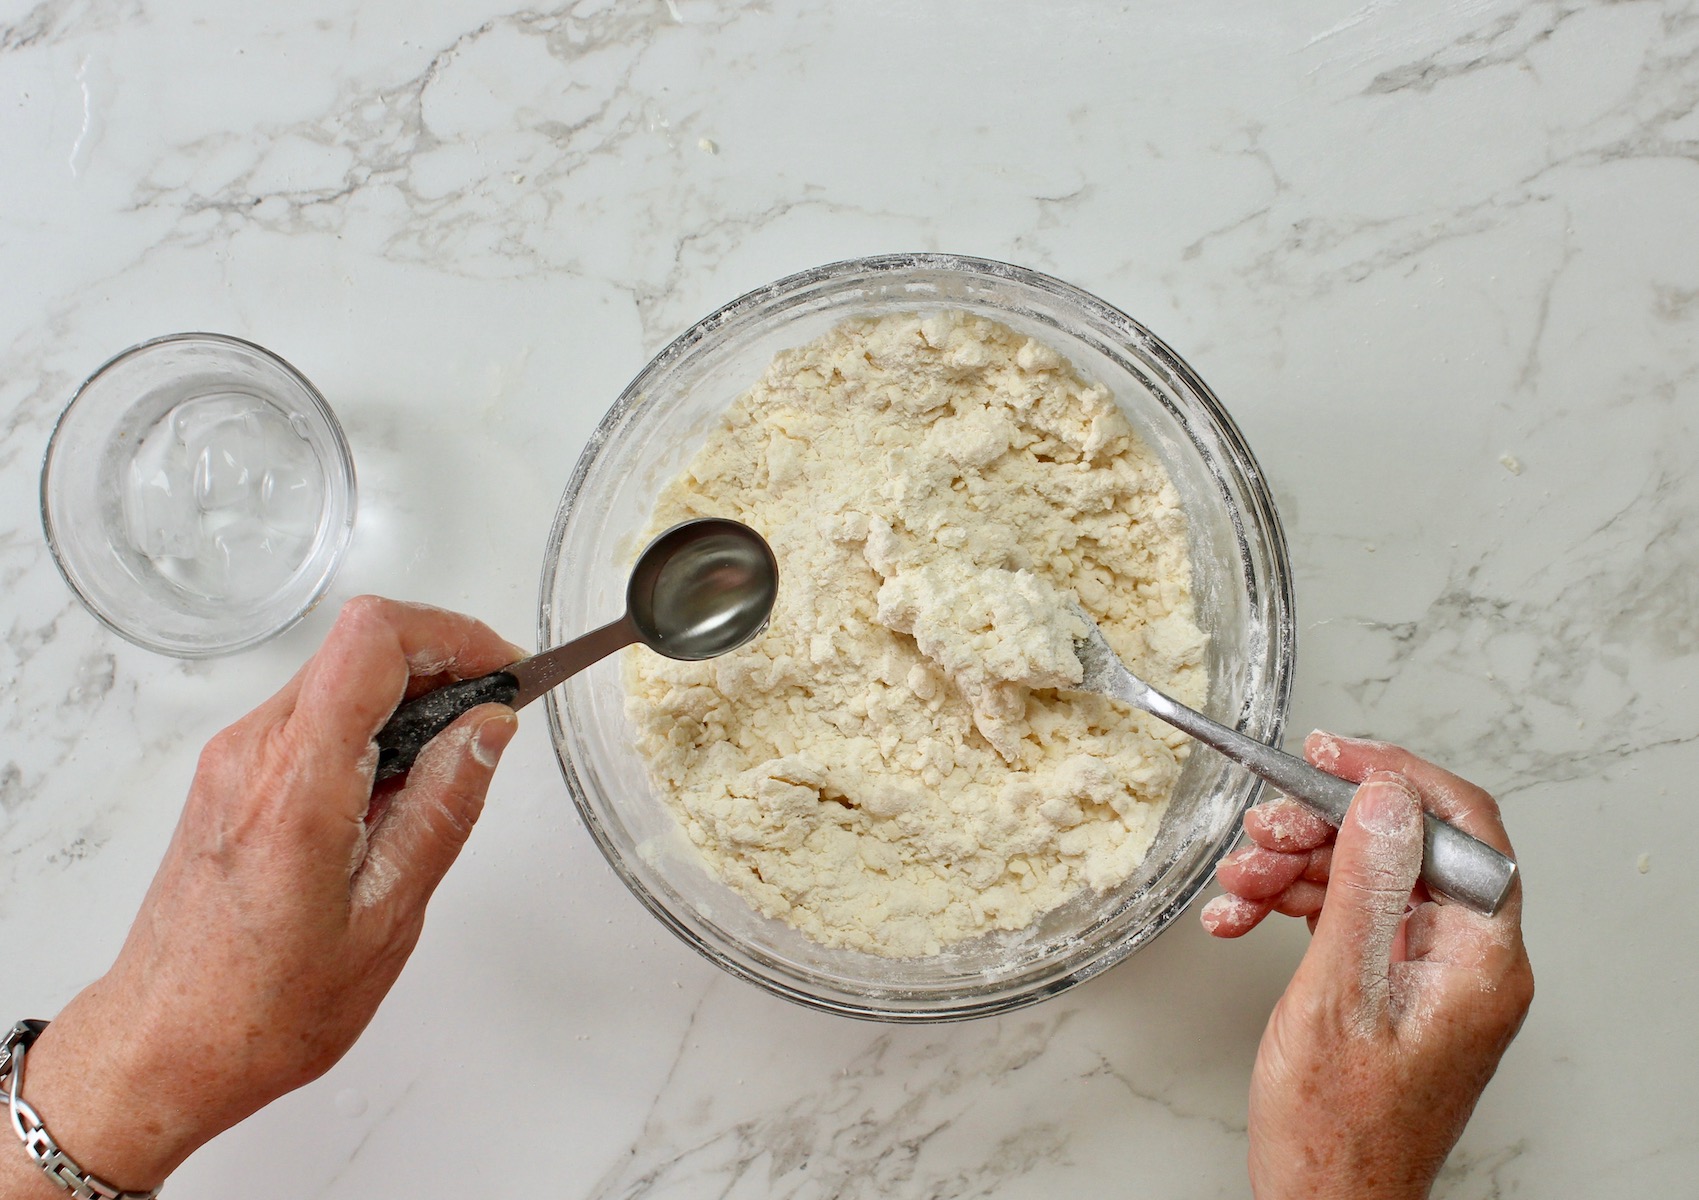
Step 5. Add more cold water, a spoonful at a time, and mix just until the dough comes together in a rough ball (you may not need to use all the water).
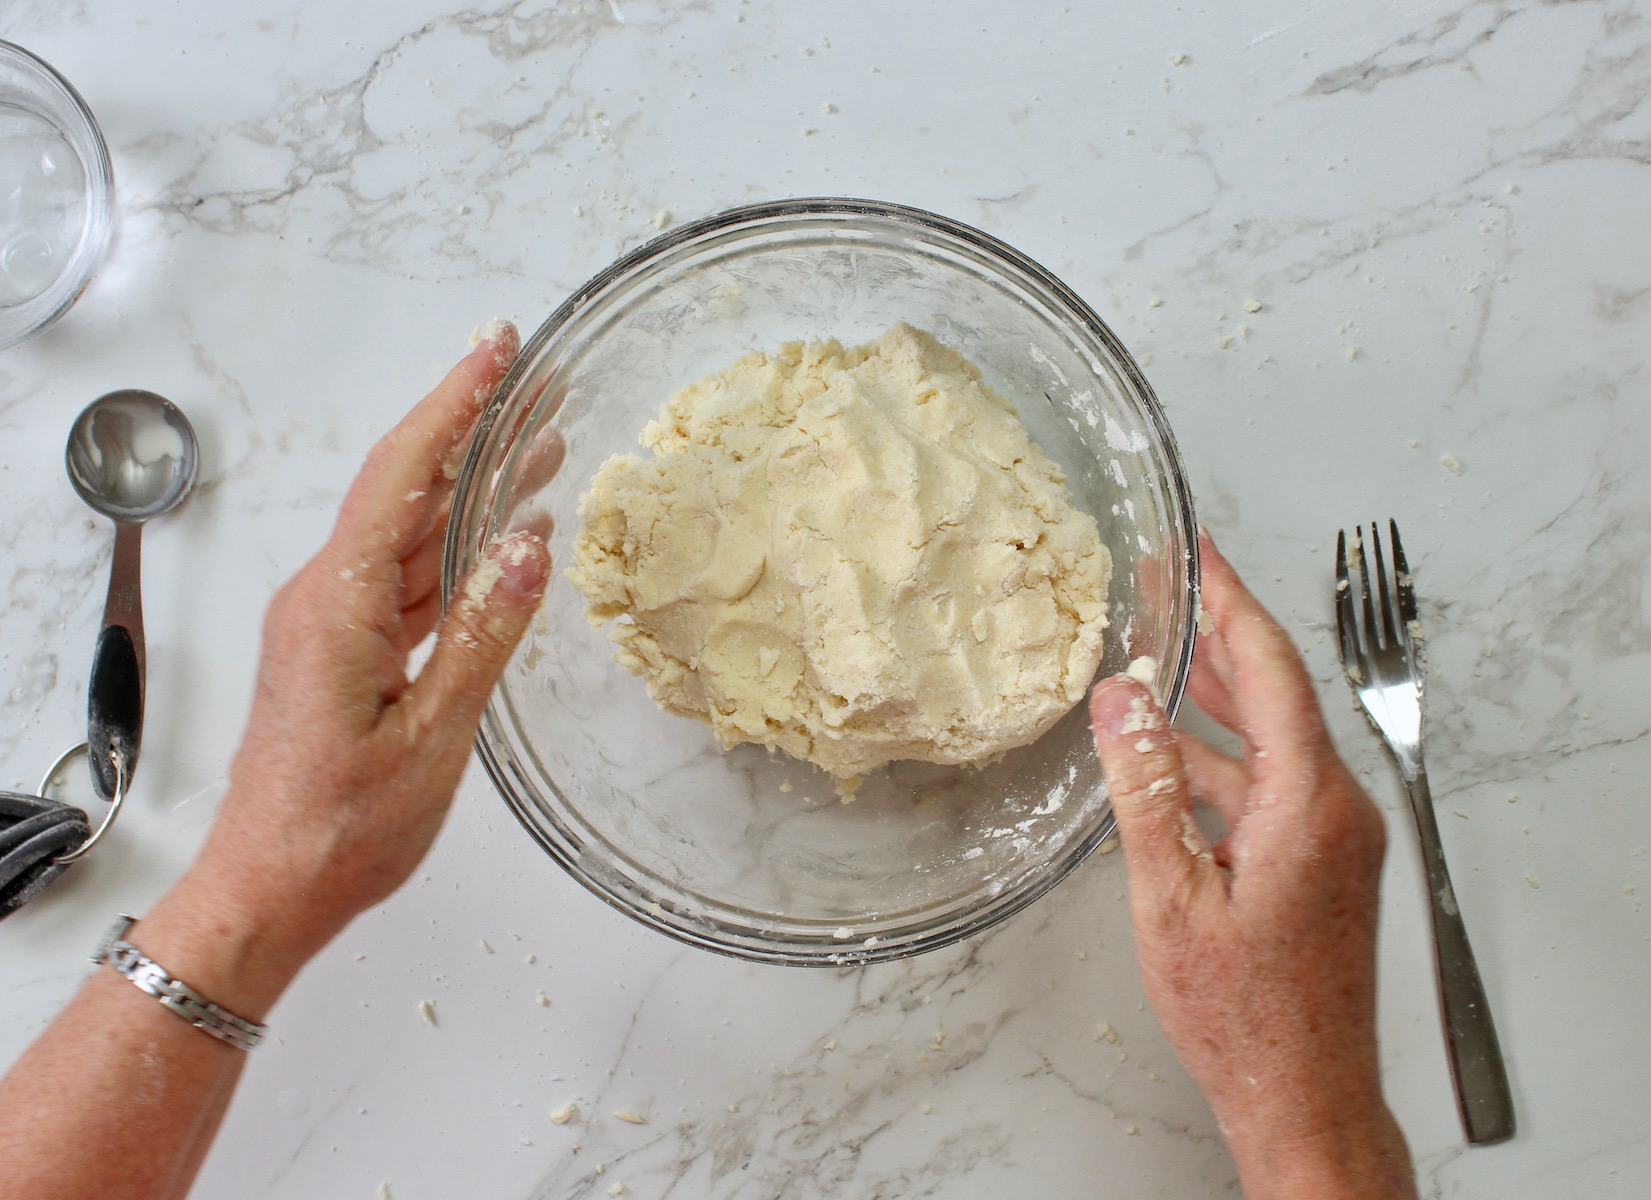
Step 6. Cover and rest for 20-30 minutes. Gluten free flours need more time to absorb liquids and get hydrated.
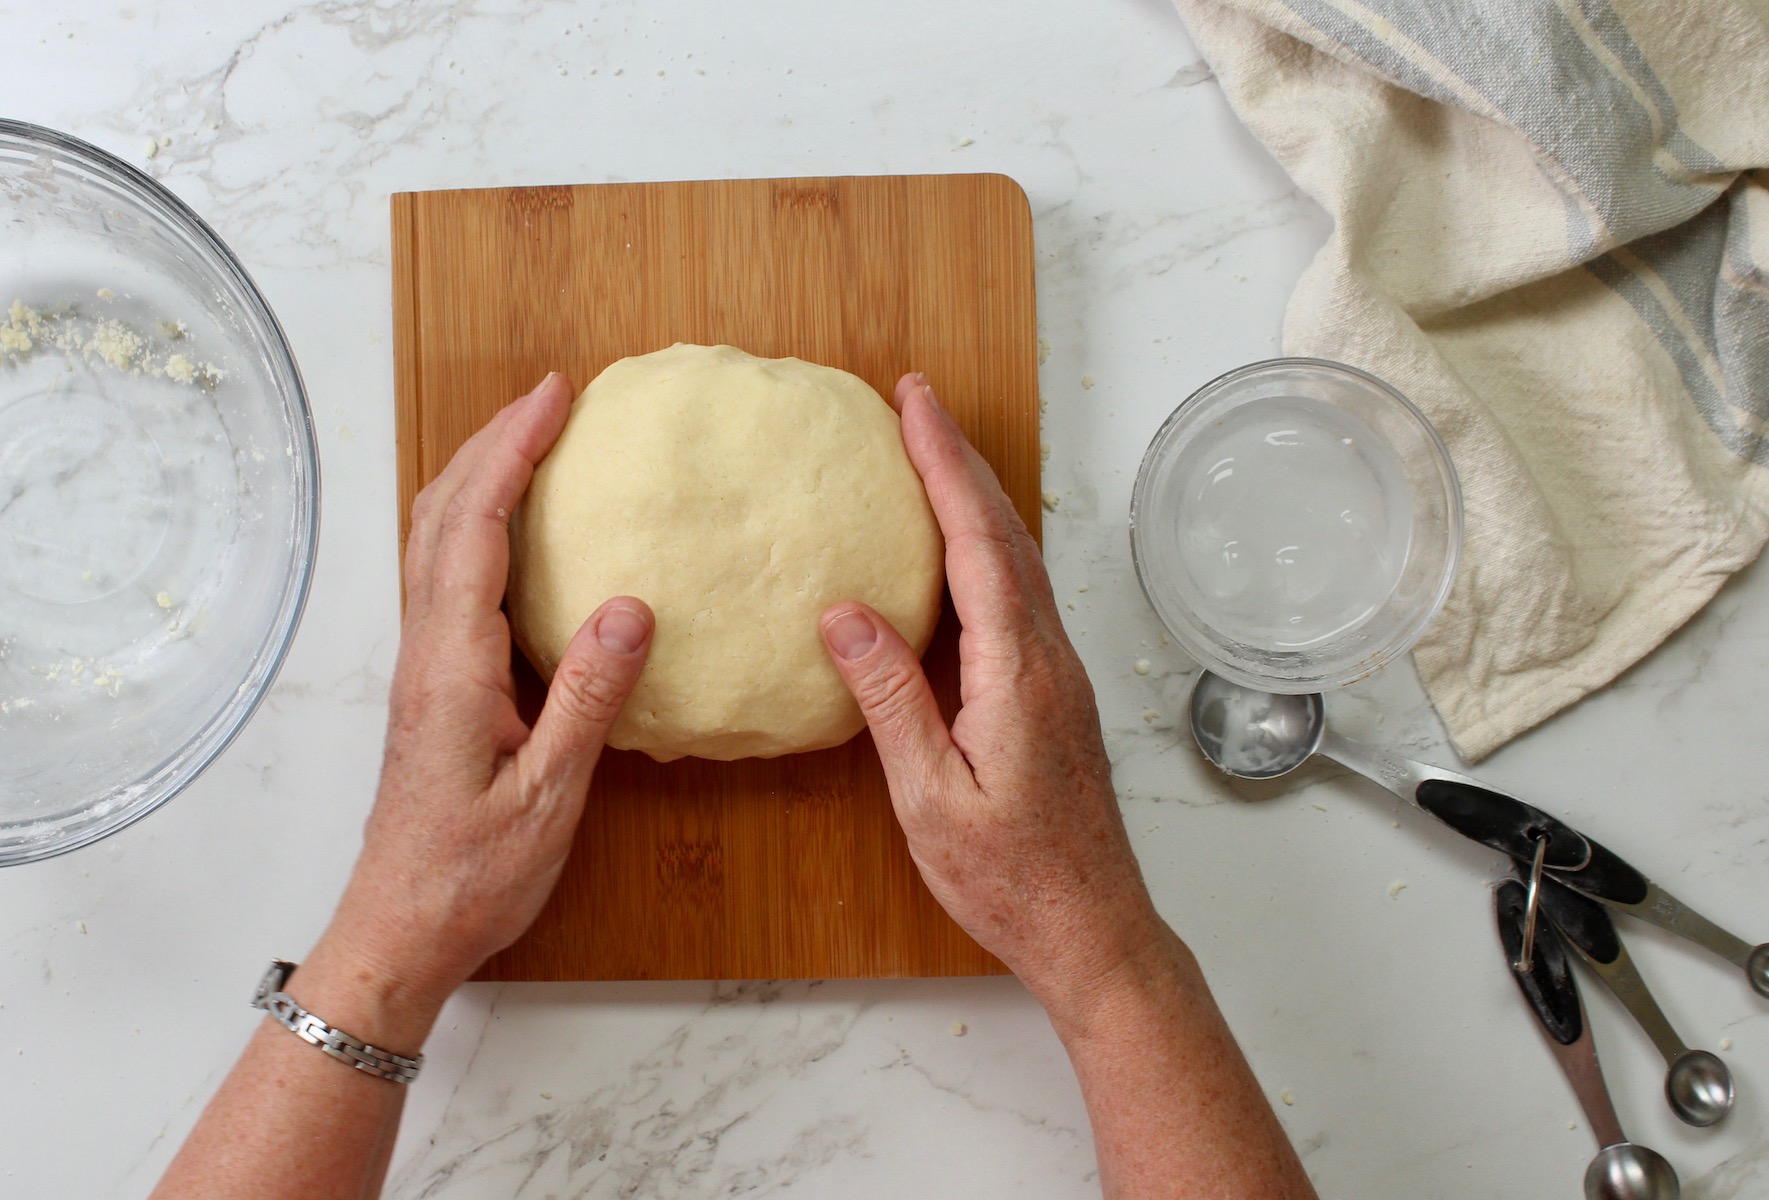
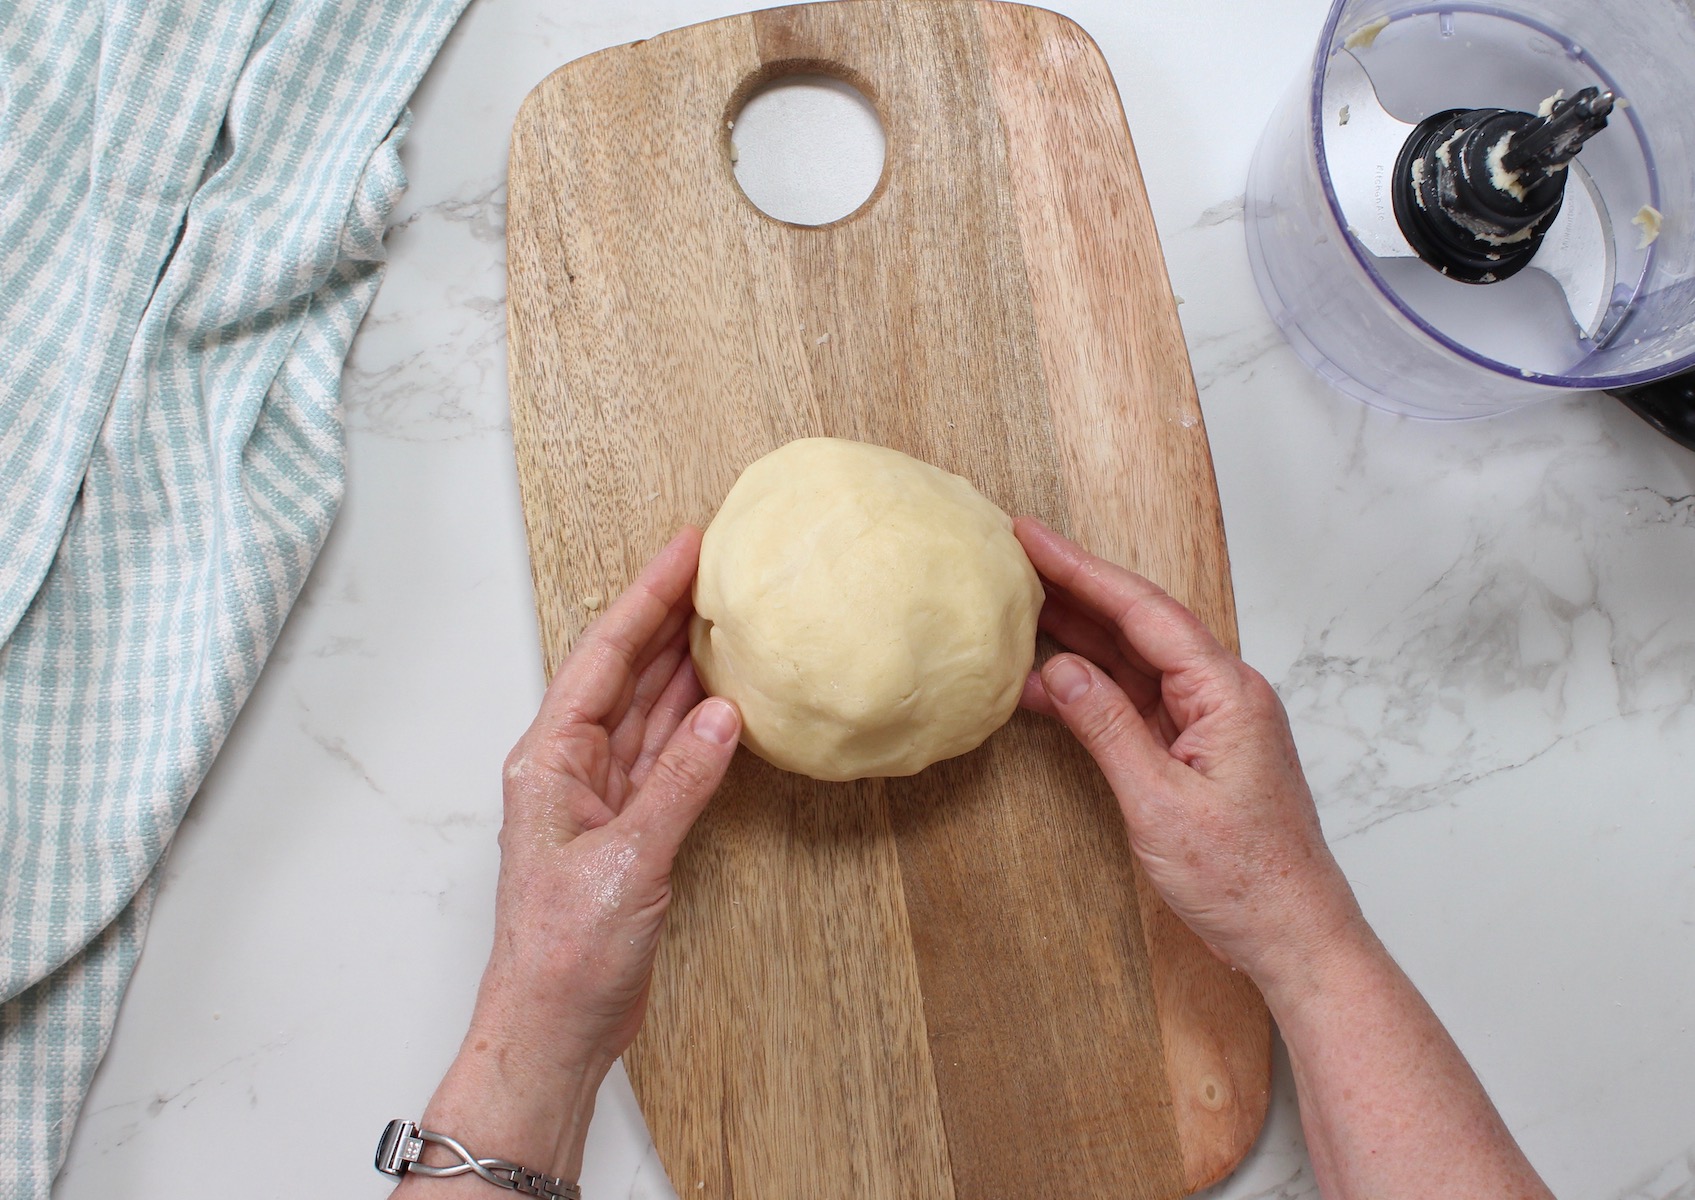
Step 7. After resting knead the dough ball by hand, adding more ice water if needed to make a very smooth pie crust dough.
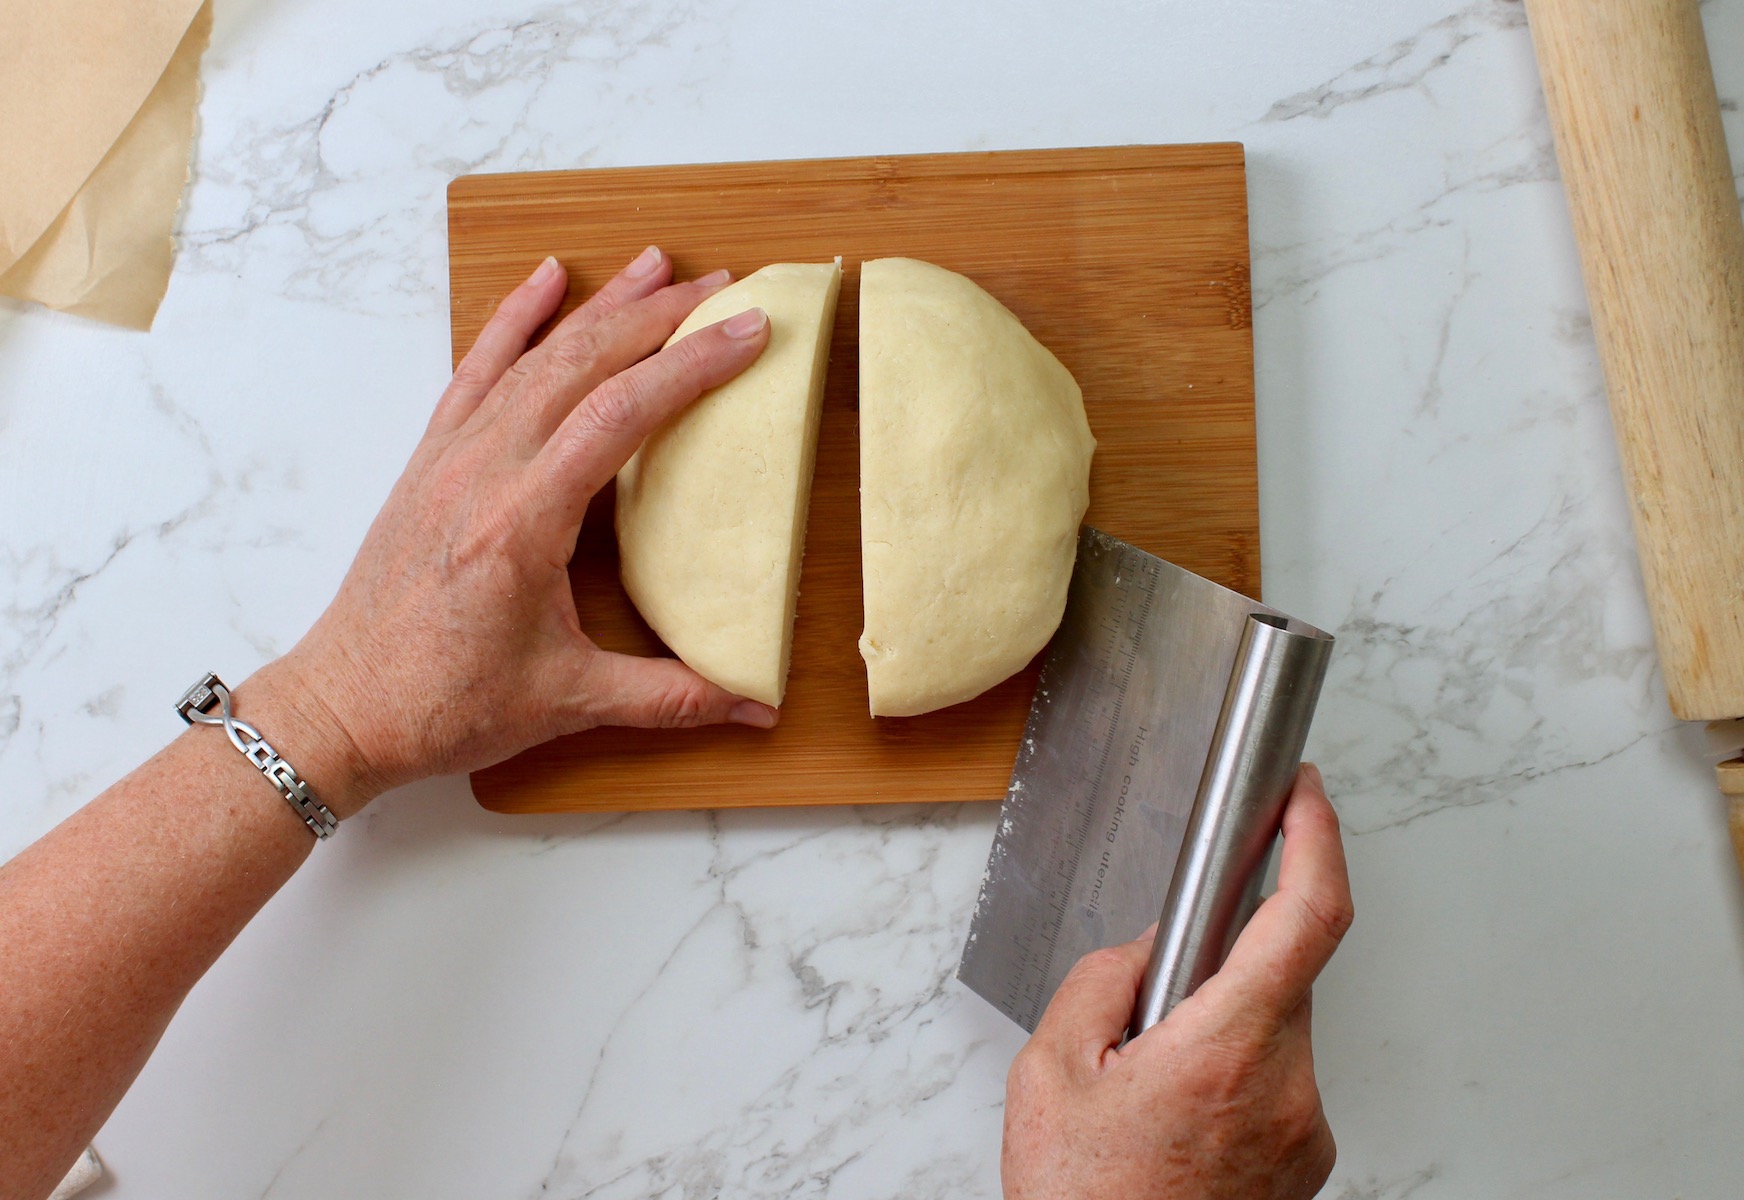
Step 8. Divide dough in half, and prepare to roll it out.
Food Processor Method

Step 1. Combine flours, sugar, xanthan gum and salt. Stir well with a whisk.
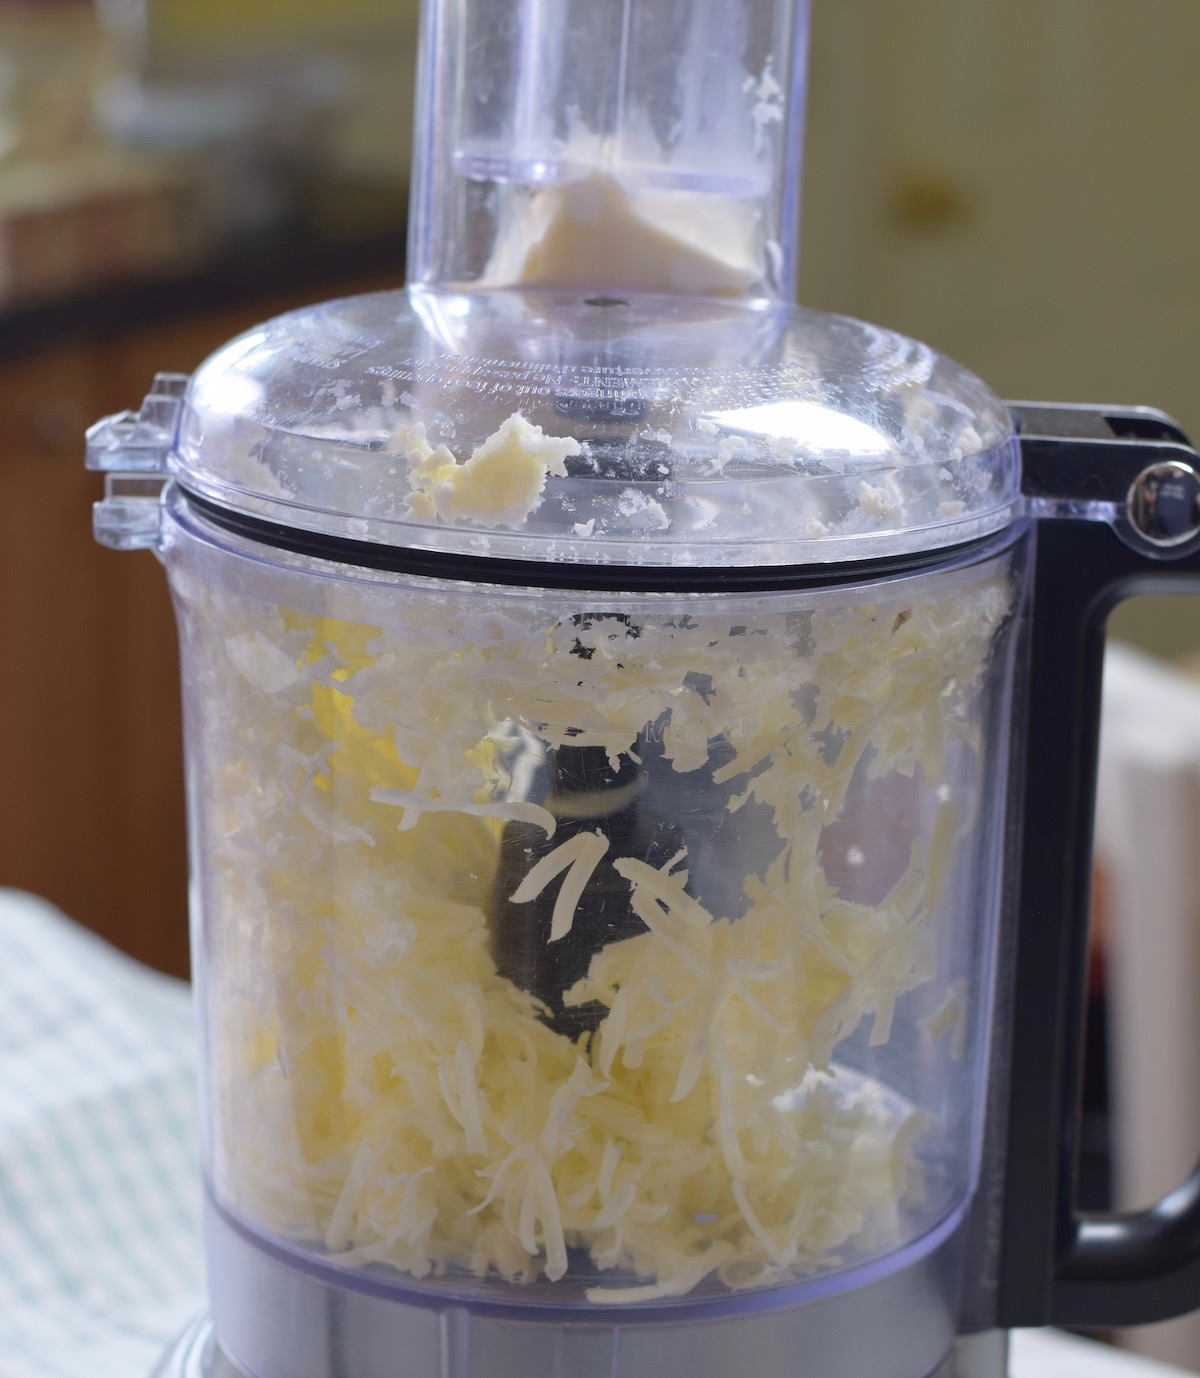
Step 2. In a food processor fitted with a grater attachment (medium, not fine) grate butter.
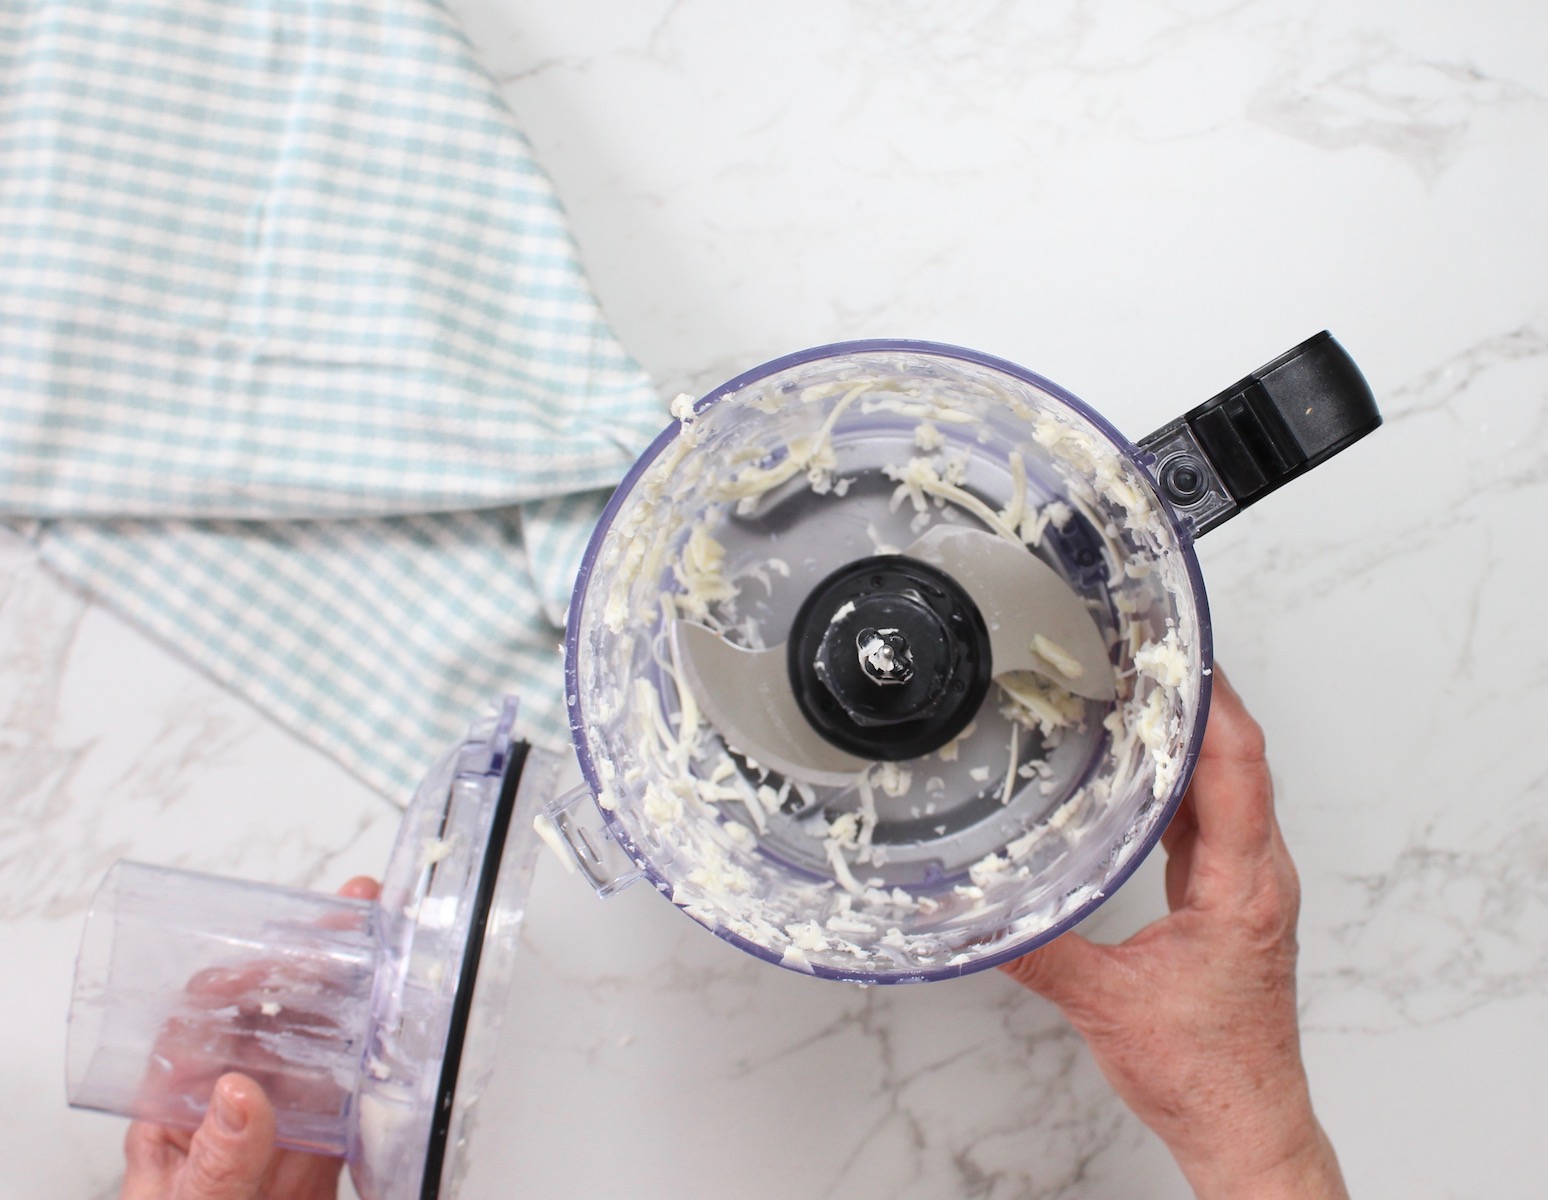
Step 3. Remove butter and grater attachment. Add the blade attachment.
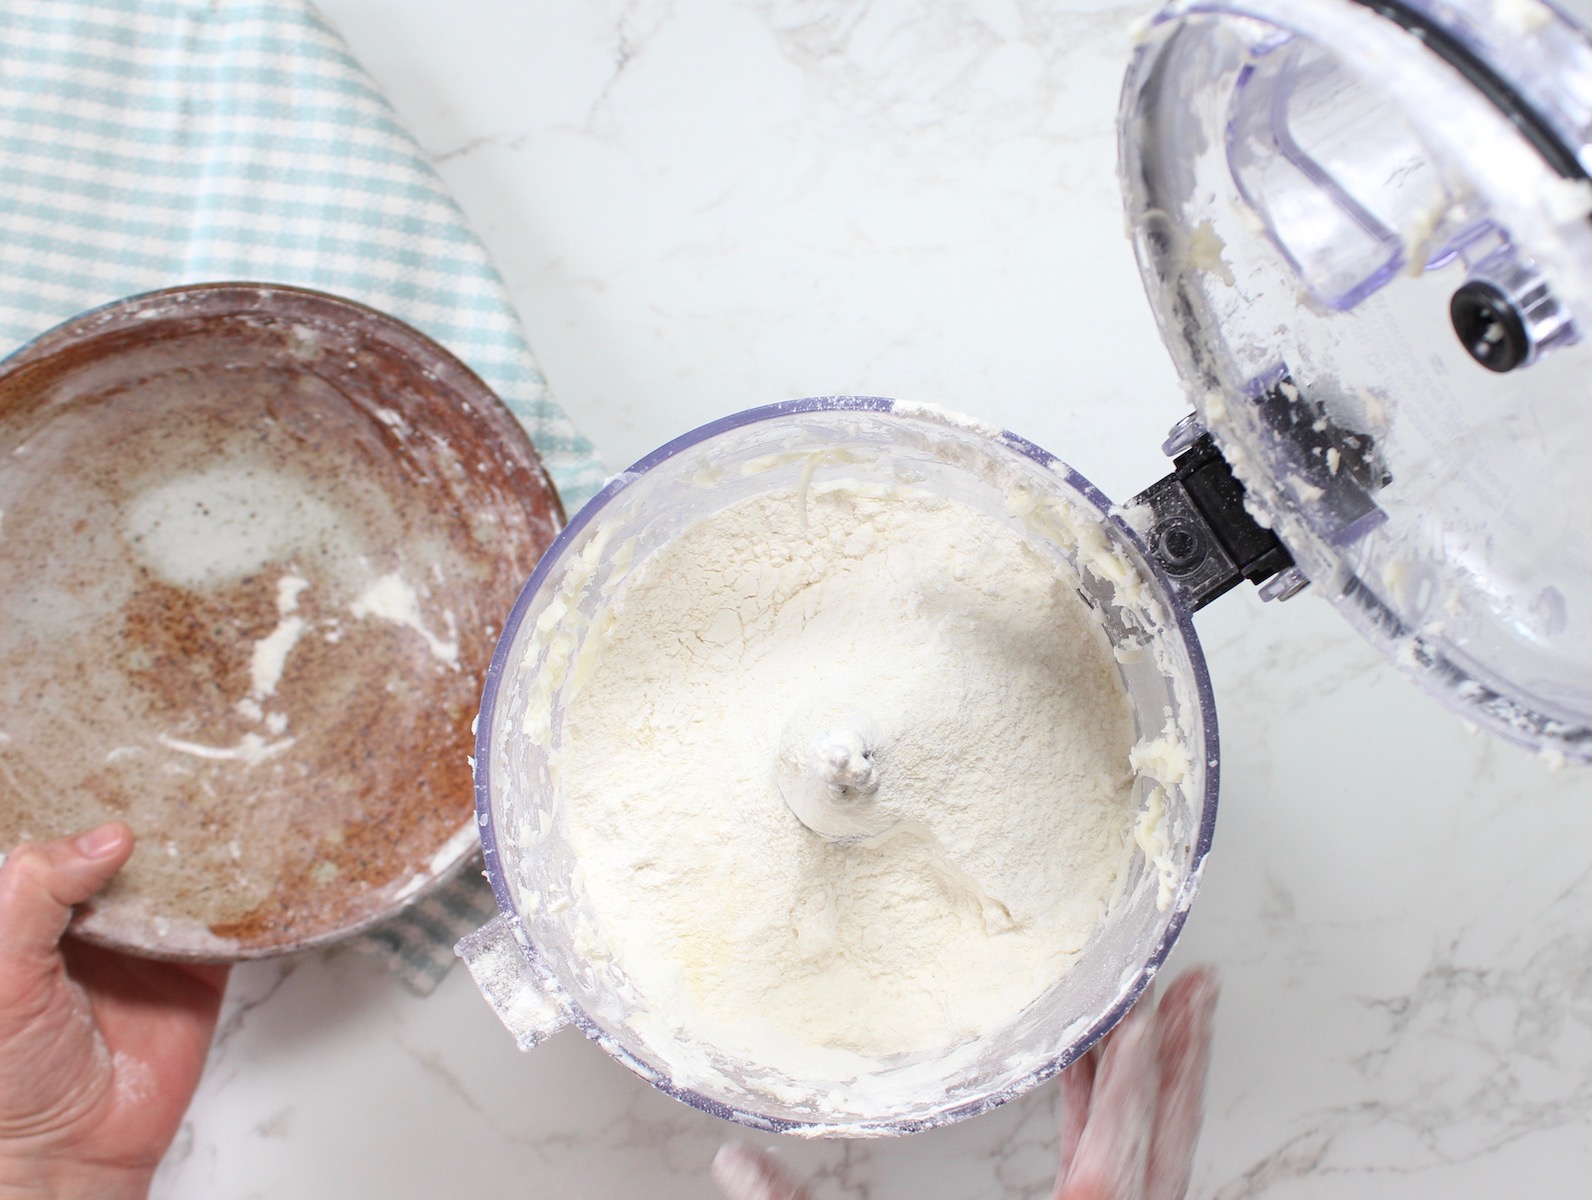
Step 4. Add flour mixture to the food processor and turn on.
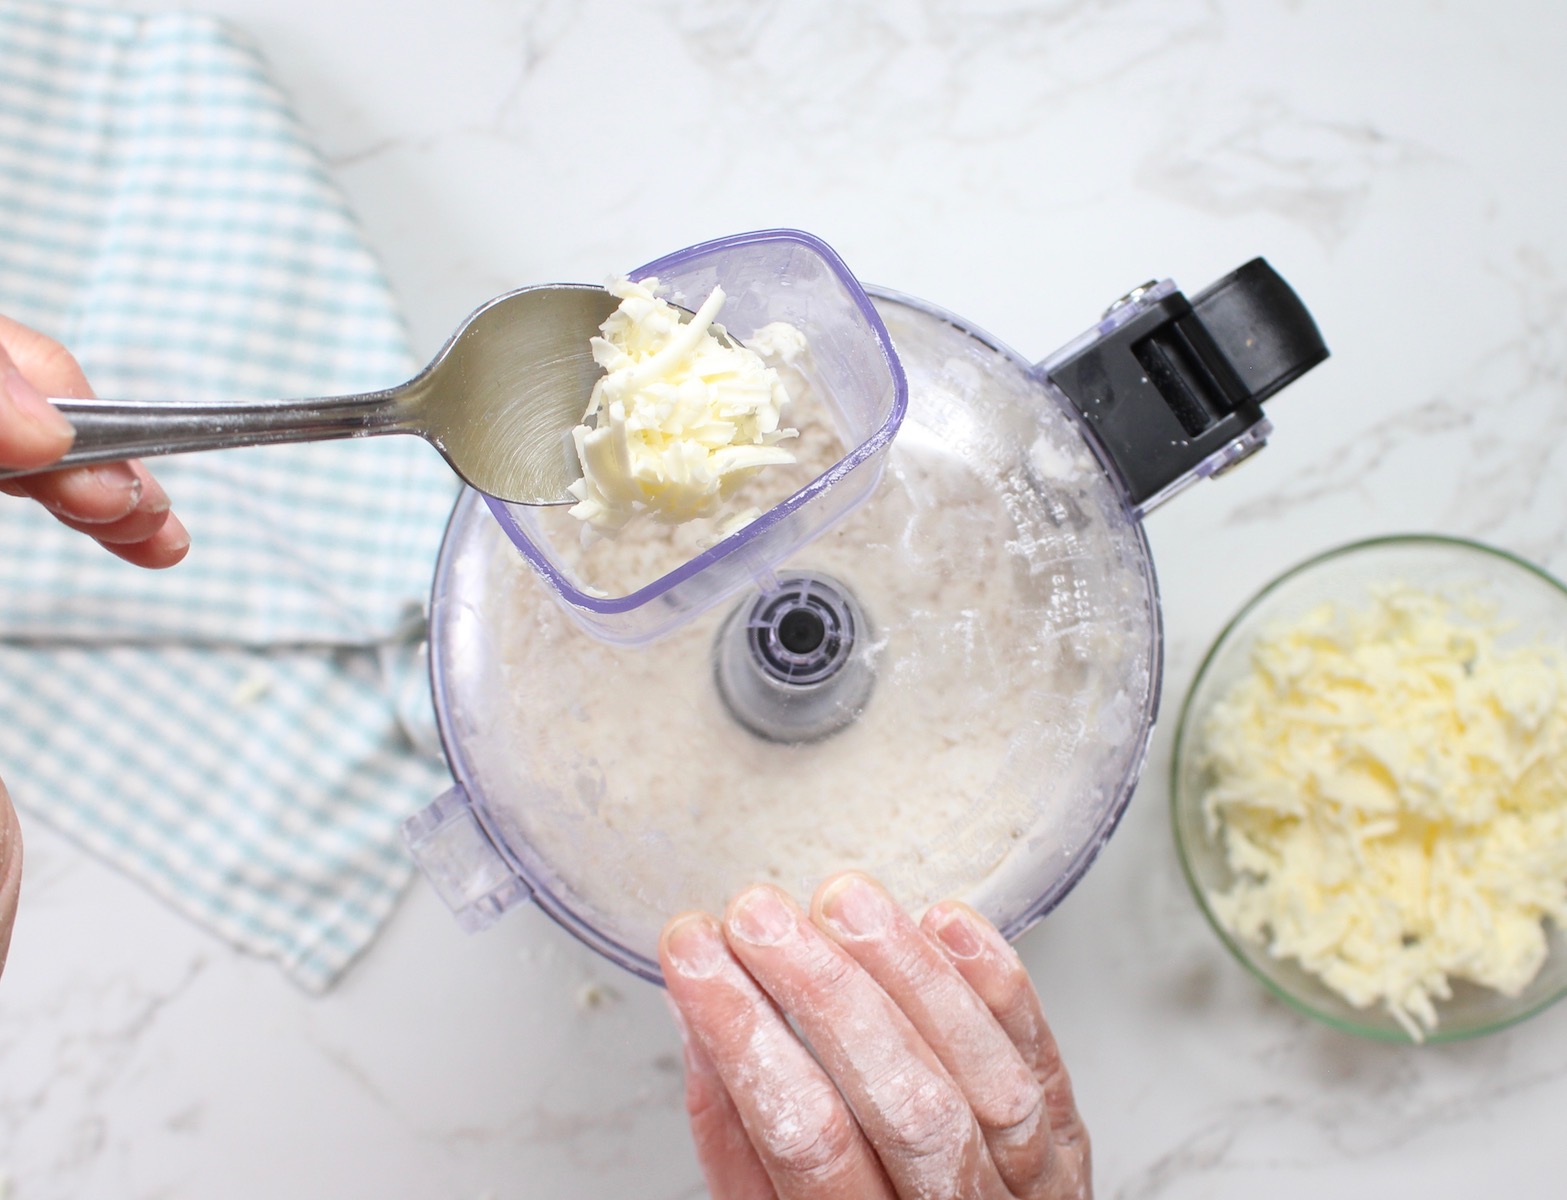
Step 5. Drop in butter shreds using a cold spoon, not your hands. Pulse until a rough ball forms.
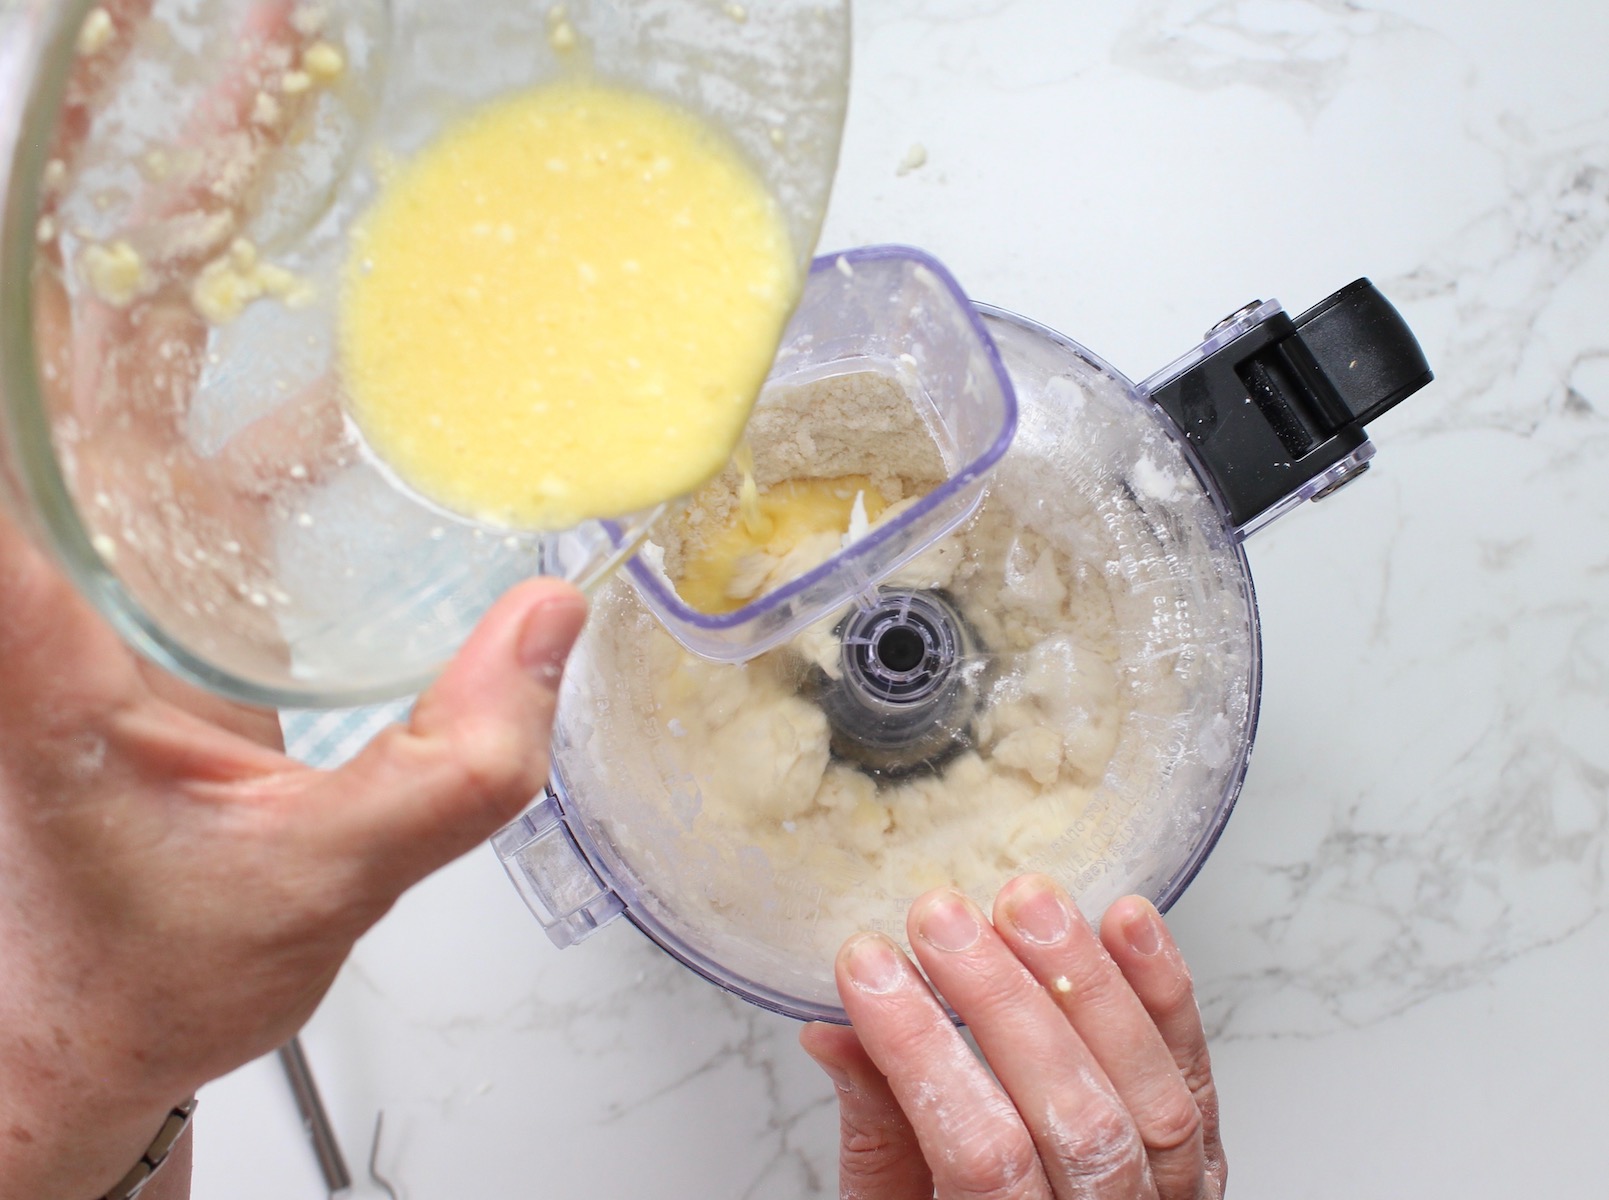
Step 6. Mix egg, vinegar, cream, and 3 Tbsp. of water in a bowl and add to the flour/butter mixture.

Step 7. Pulse and blend, adding ice water by the spoonful if needed until the dough comes together in a ball. Note: you may or may not need to use all the water - just add water a little at a time until the dough comes together in a rough ball.
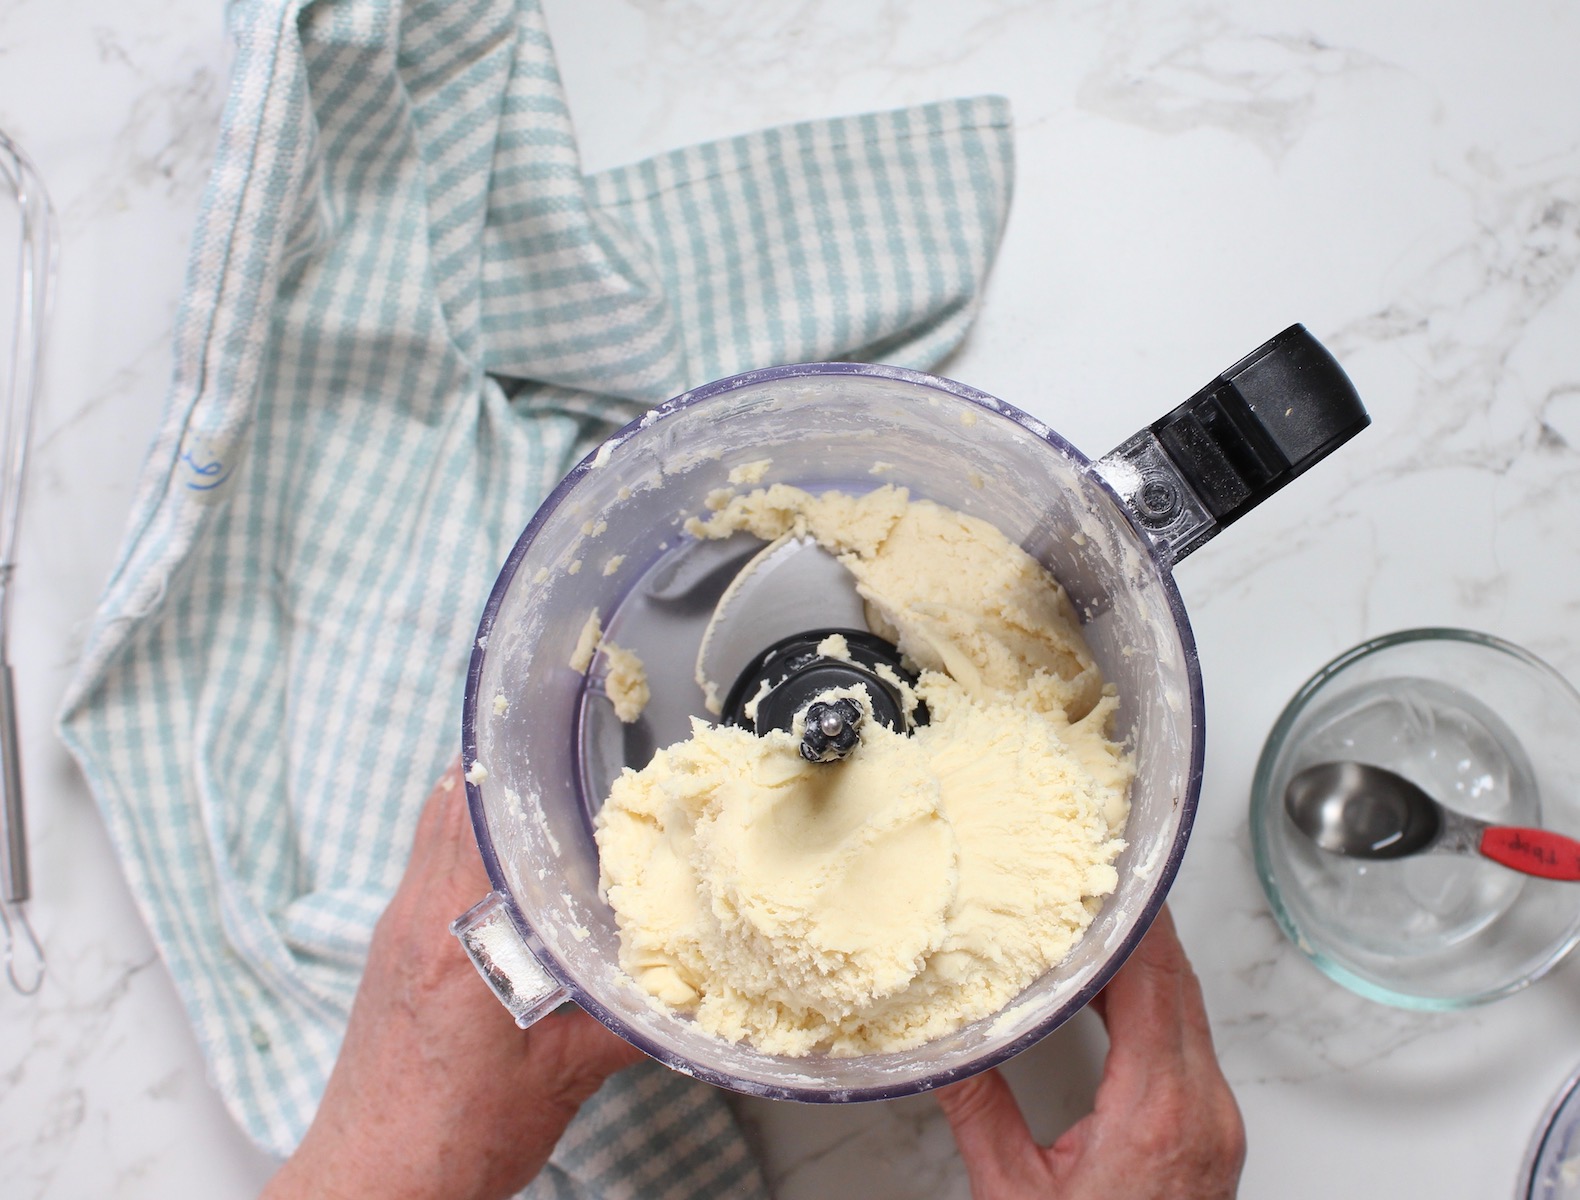
Step 8. Let the dough rest in the food processor for an hour at room temperature. This step allows the gluten free flour to fully absorb the liquids and fats in the dough and should not be skipped.
Step 9. Knead the dough ball briefly on your work surface by hand until it's smooth and elastic. Now you can roll it out as needed for your recipe.
Gluten Free Pie Crust Recipe
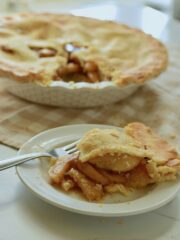
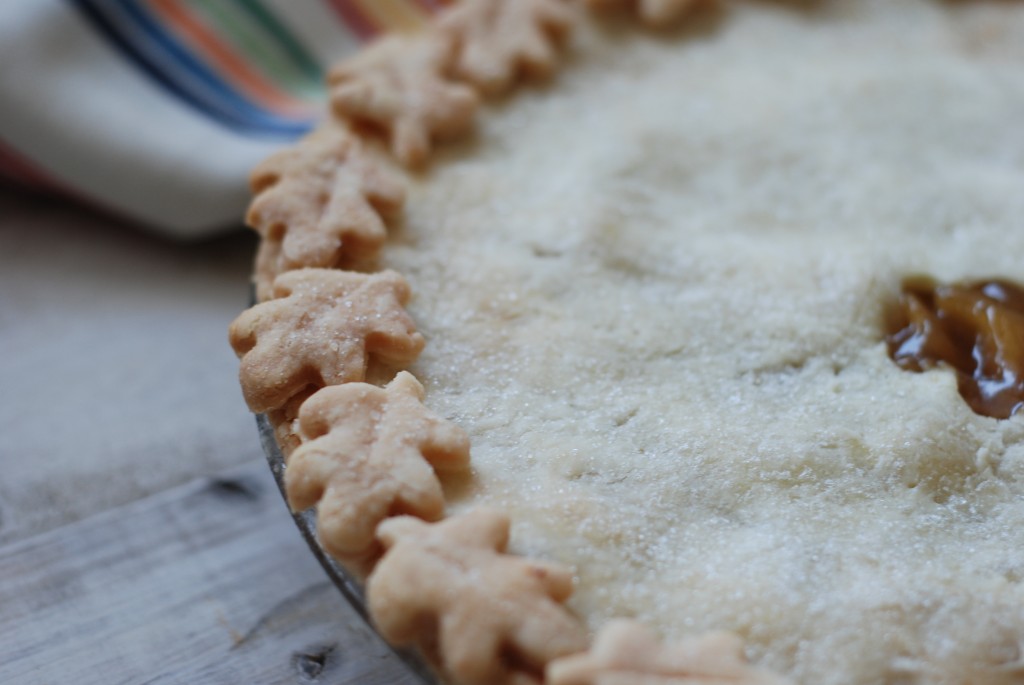
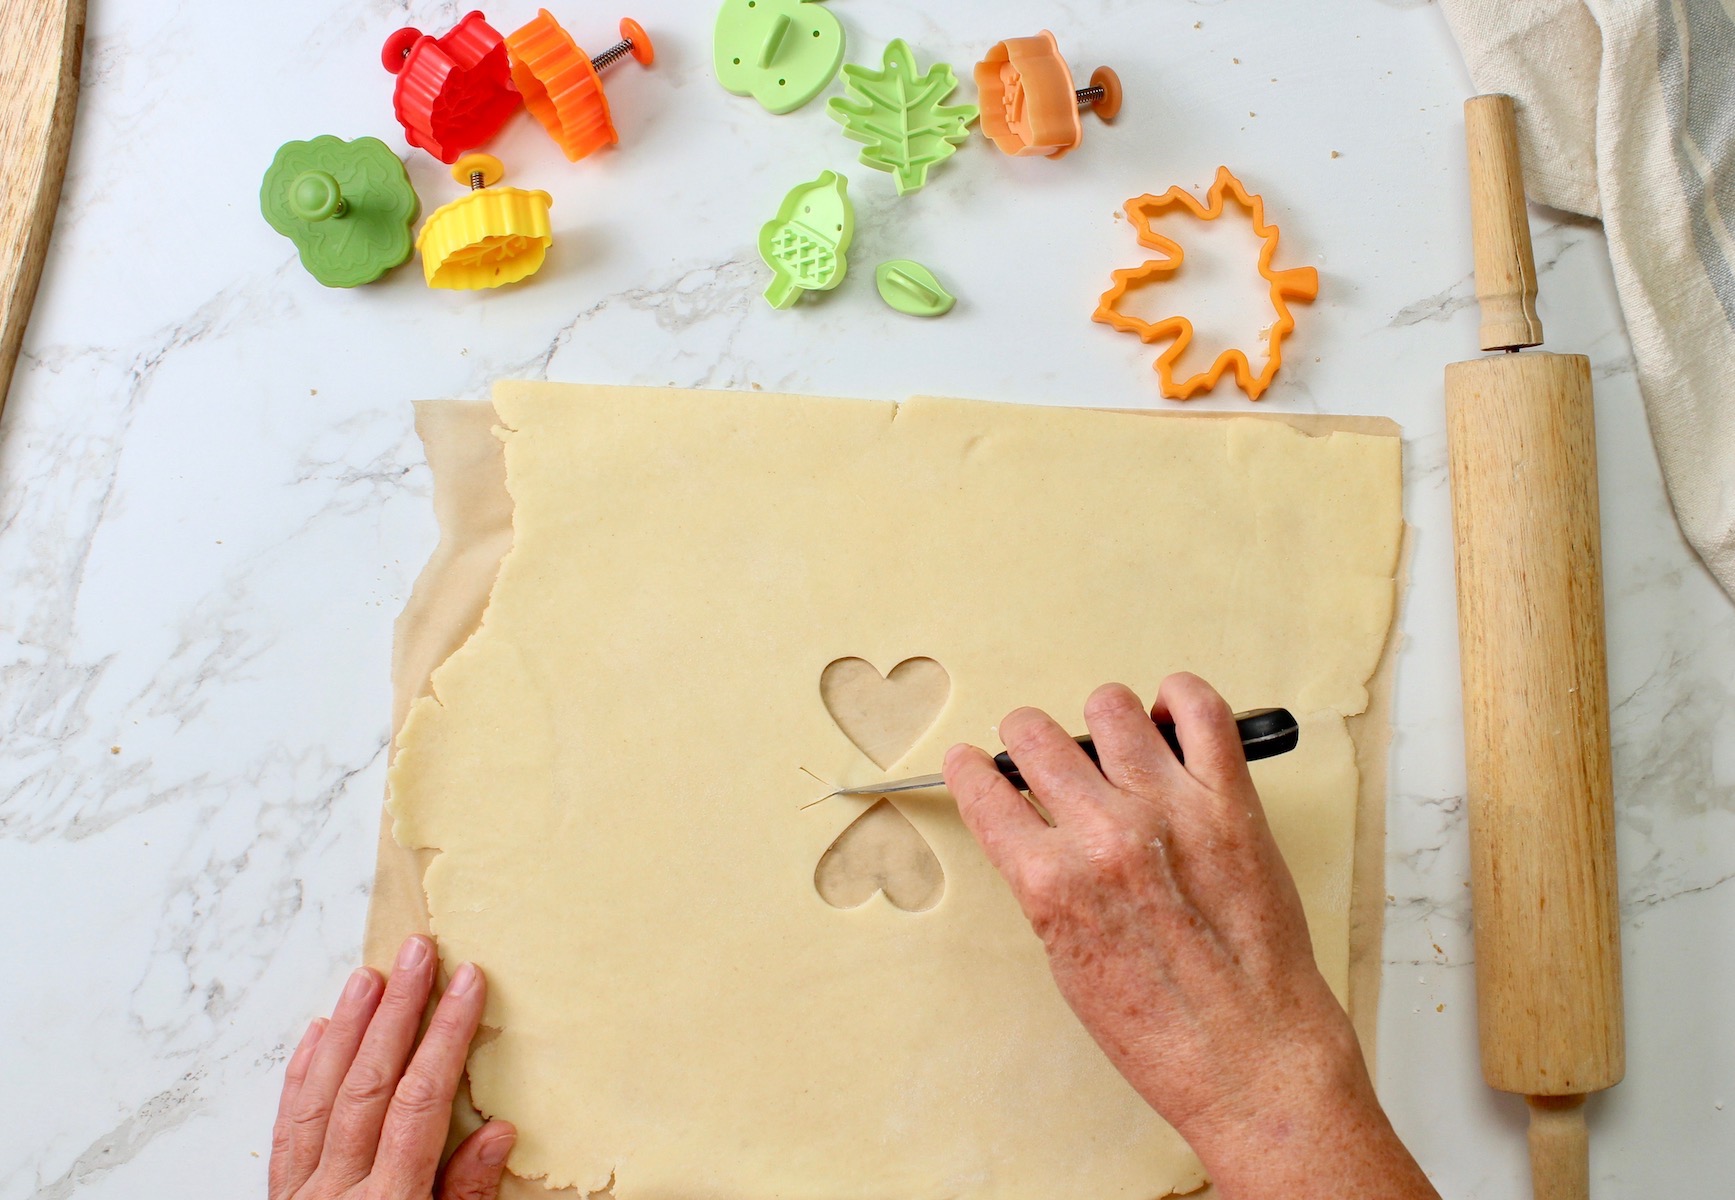
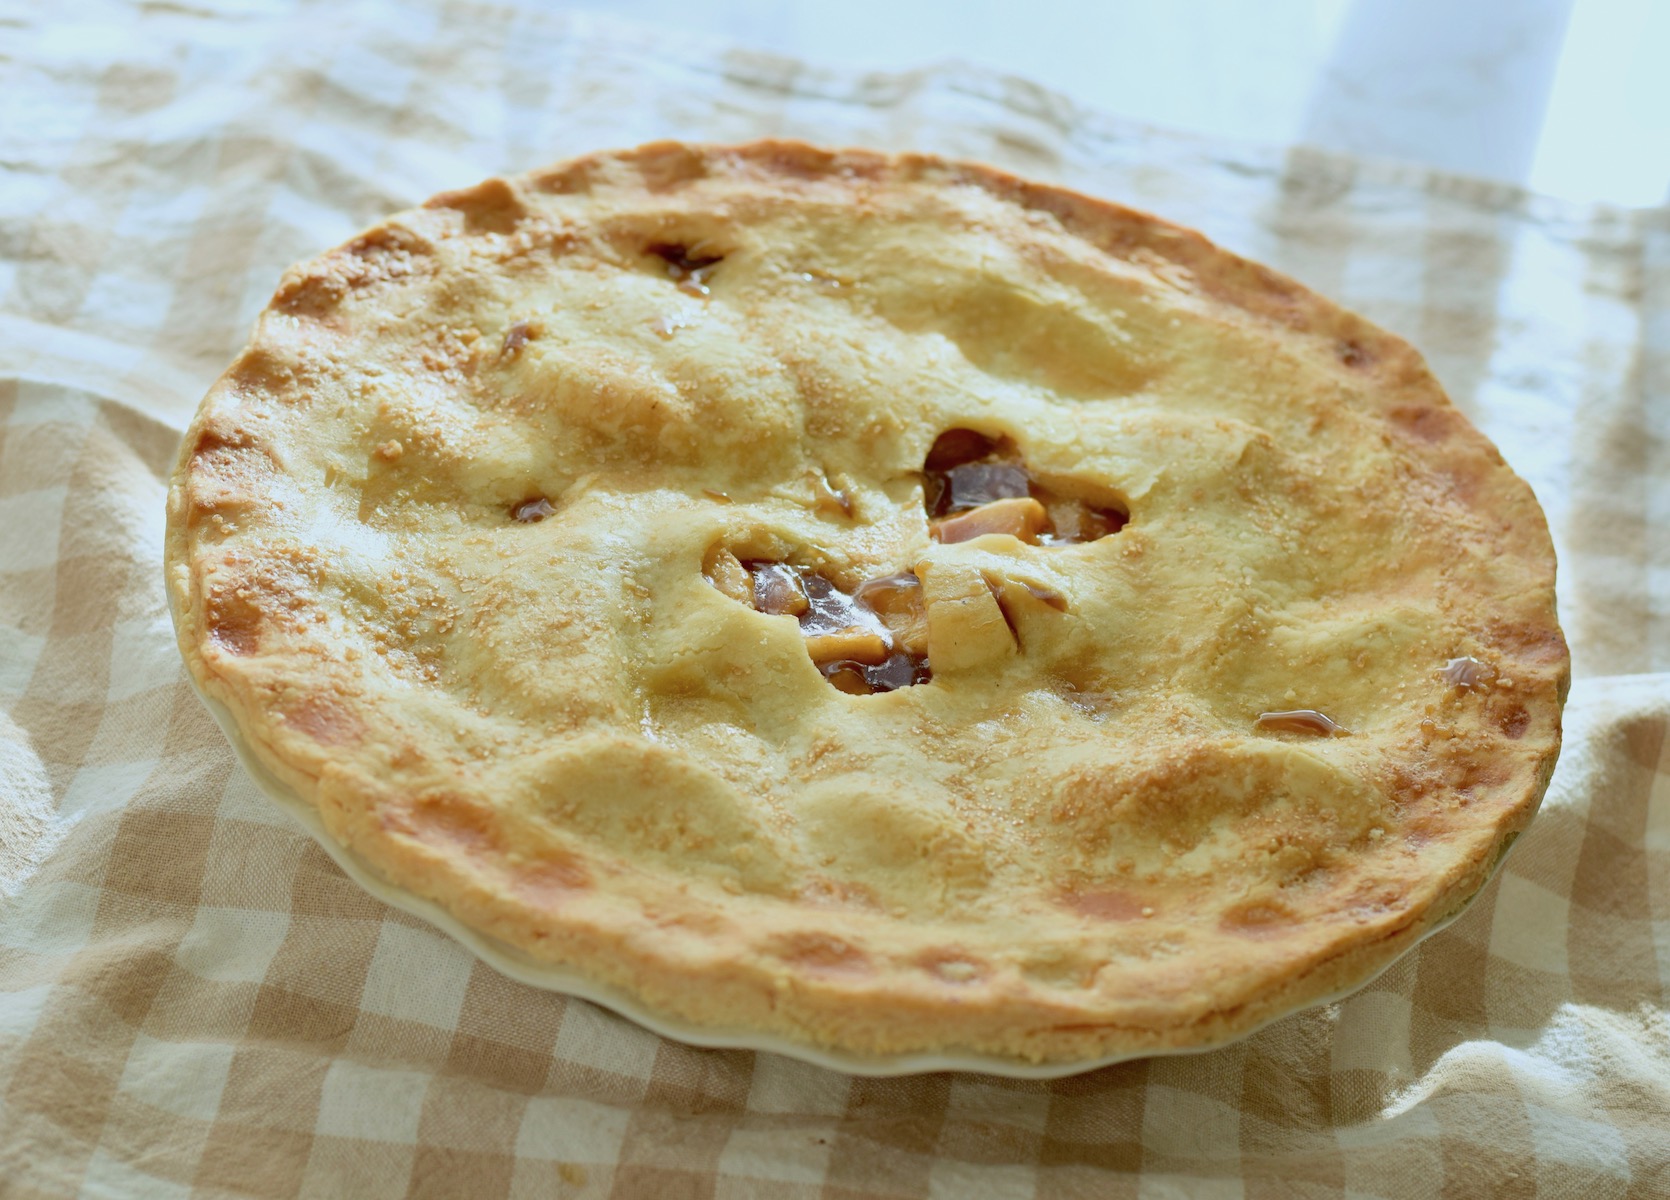
This pie crust is buttery, flaky and delicious! You can shape it, crimp the edges, and weave lattice tops just like with a wheat crust. I can also cut fancy embossed shapes with mini cutters to decorate pies, and they don't puff up as they cook - they keep their shape beautifully!
- Prep Time: 1 hour 30 minutes
- Cook Time: 50 minutes
- Total Time: 2 hours 20 minutes
- Yield: 6 slices 1x
- Category: Dessert
- Method: bake
- Diet: Gluten Free
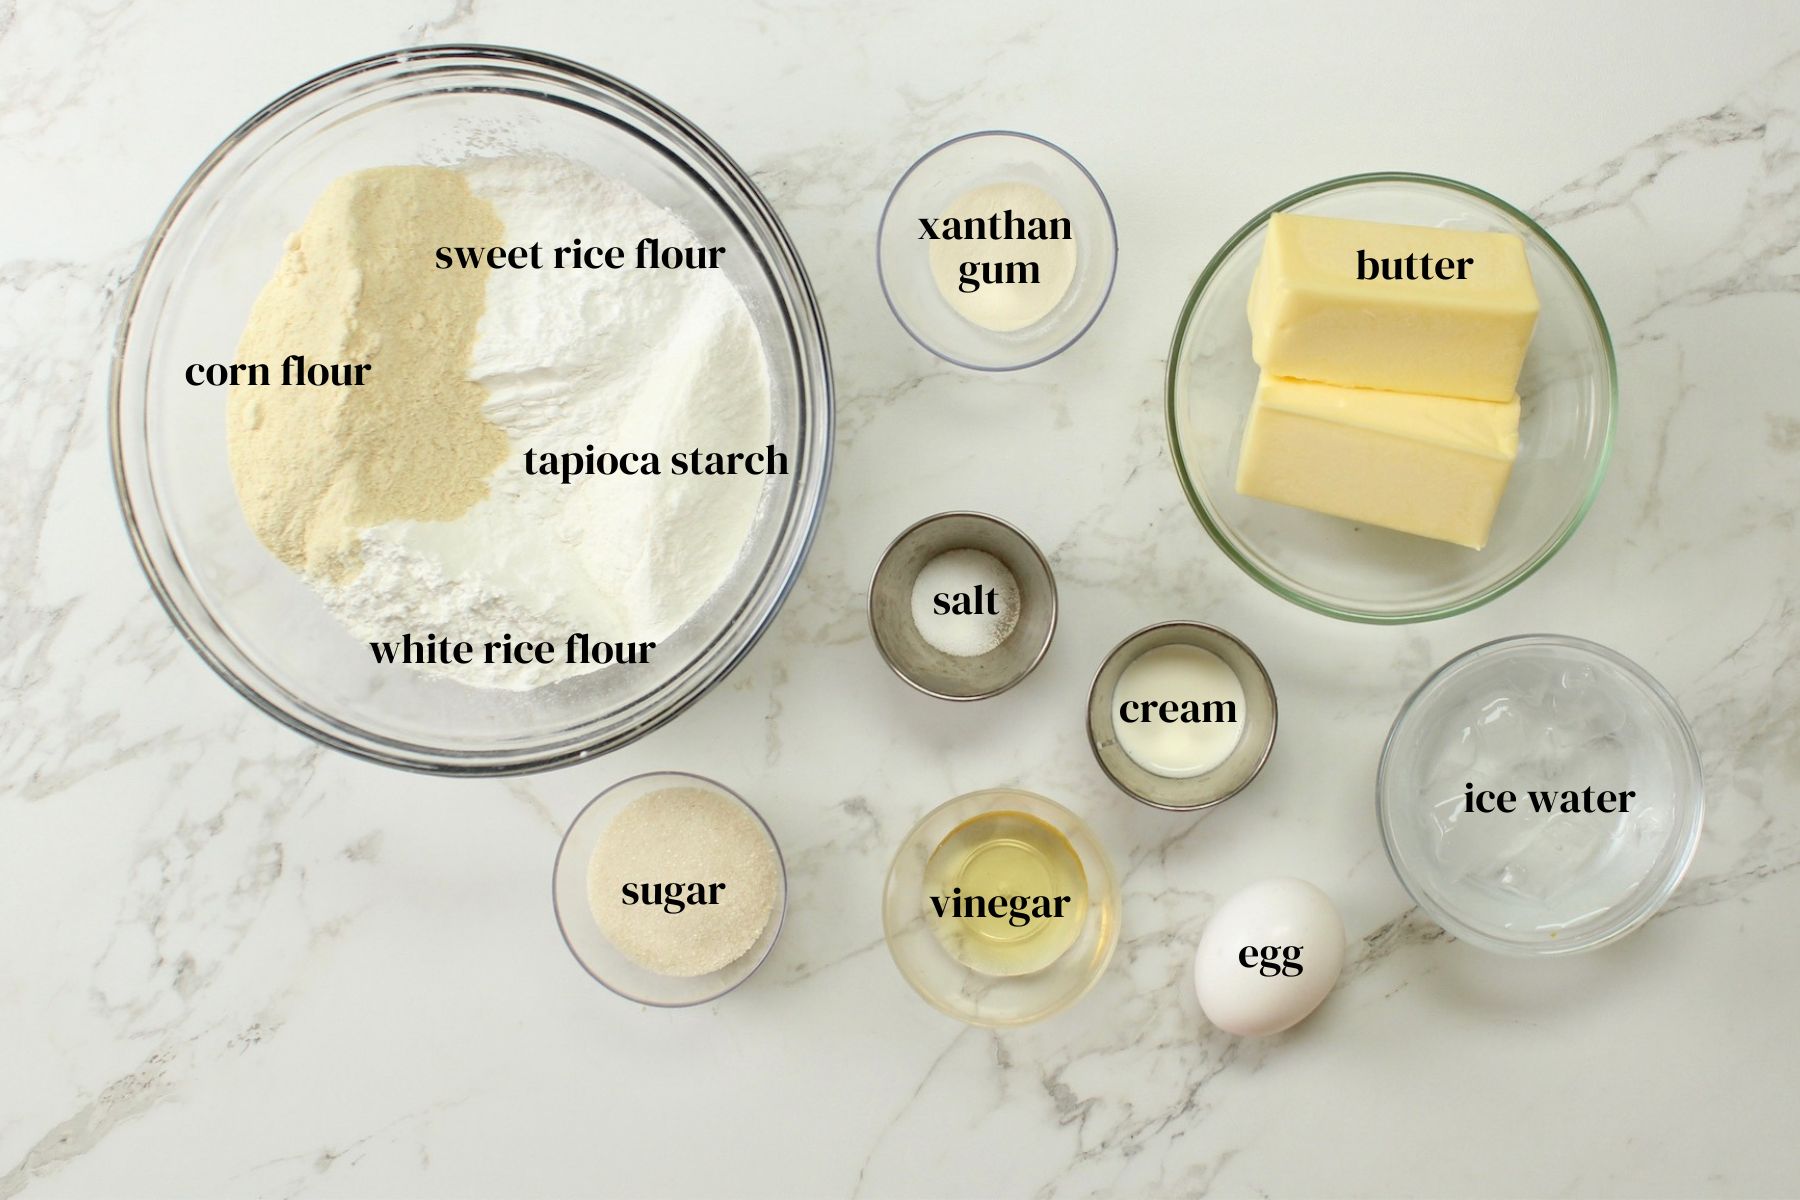
Ingredients
- 94 gm. Sweet rice flour
- 94 gm. White rice flour
- 112 gm. Tapioca starch
- 75 gm. Corn flour ( not corn starch)
- 1 ½ tsp. Xanthan gum
- 3 tablespoons granulated sugar
- ½ teaspoon salt
- 1 cup of very cold butter, or 2 sticks, up to 250 gm.
- 1 large egg
- 1 tablespoon vinegar (I use apple cider vinegar)
- 1 tablespoon cream, half and half, or whole milk (I prefer cream)
- Ice cold water, up to 6 tablespoons
Instructions
- Combine all the flours, sugar, xanthan gum, and salt in a large bowl. Stir well with a whisk.
- Using a box grater, grate the butter.
- After grating the first stick, take a minute to toss the butter shreds into the flour so they stay separated as much as possible. Then grate the other stick, and toss as before.
- Mix the egg, vinegar, cream, and 3 tablespoons of ice water together in a small bowl and stir into the flour/butter mixture with a spoon or spatula.
- Add cold water, 1 tablespoon at a time, until the dough comes together in a rough ball.
- At this point, let the shaggy dough ball sit at room temperature, covered, for about an hour so the flours blend and absorb the liquids. The dough will be pretty dry at this point, but resting will help change that.
- Now add the remaining few tablespoons of water, one at a time, and mix with your hands until the dough ball is smooth.
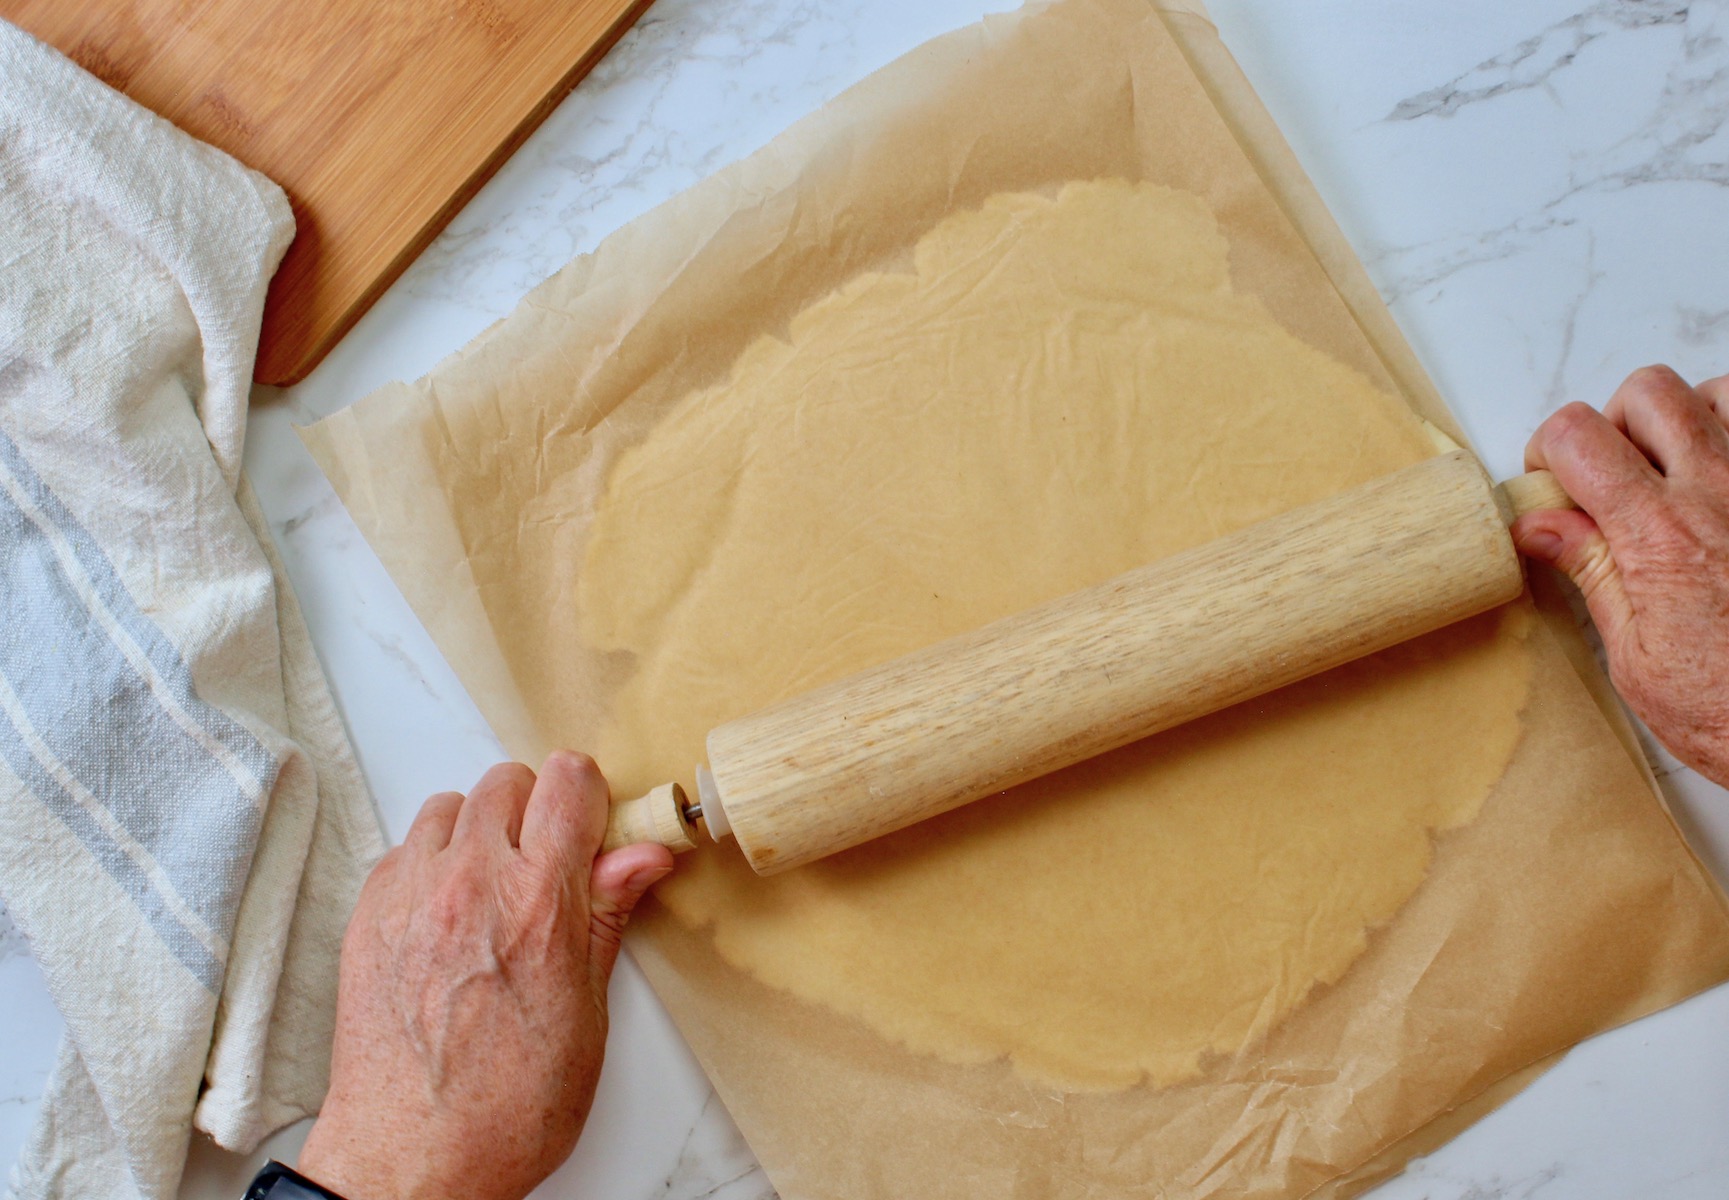
- Roll out the bottom crust using the parchment paper method and put in a pie tin.
- Roll out and cut the top crust as desired. At this point the top crust can be chilled inside its parchment paper layers if desired.
- Assemble the pie. If the top crust is too cold and stiff, let it sit at room temperature for a few minutes until it becomes more pliable again, then crimp the edges as desired.
- Chill a second time: chill the pie once more before baking. I like to put mine in the fridge while the oven is preheating.
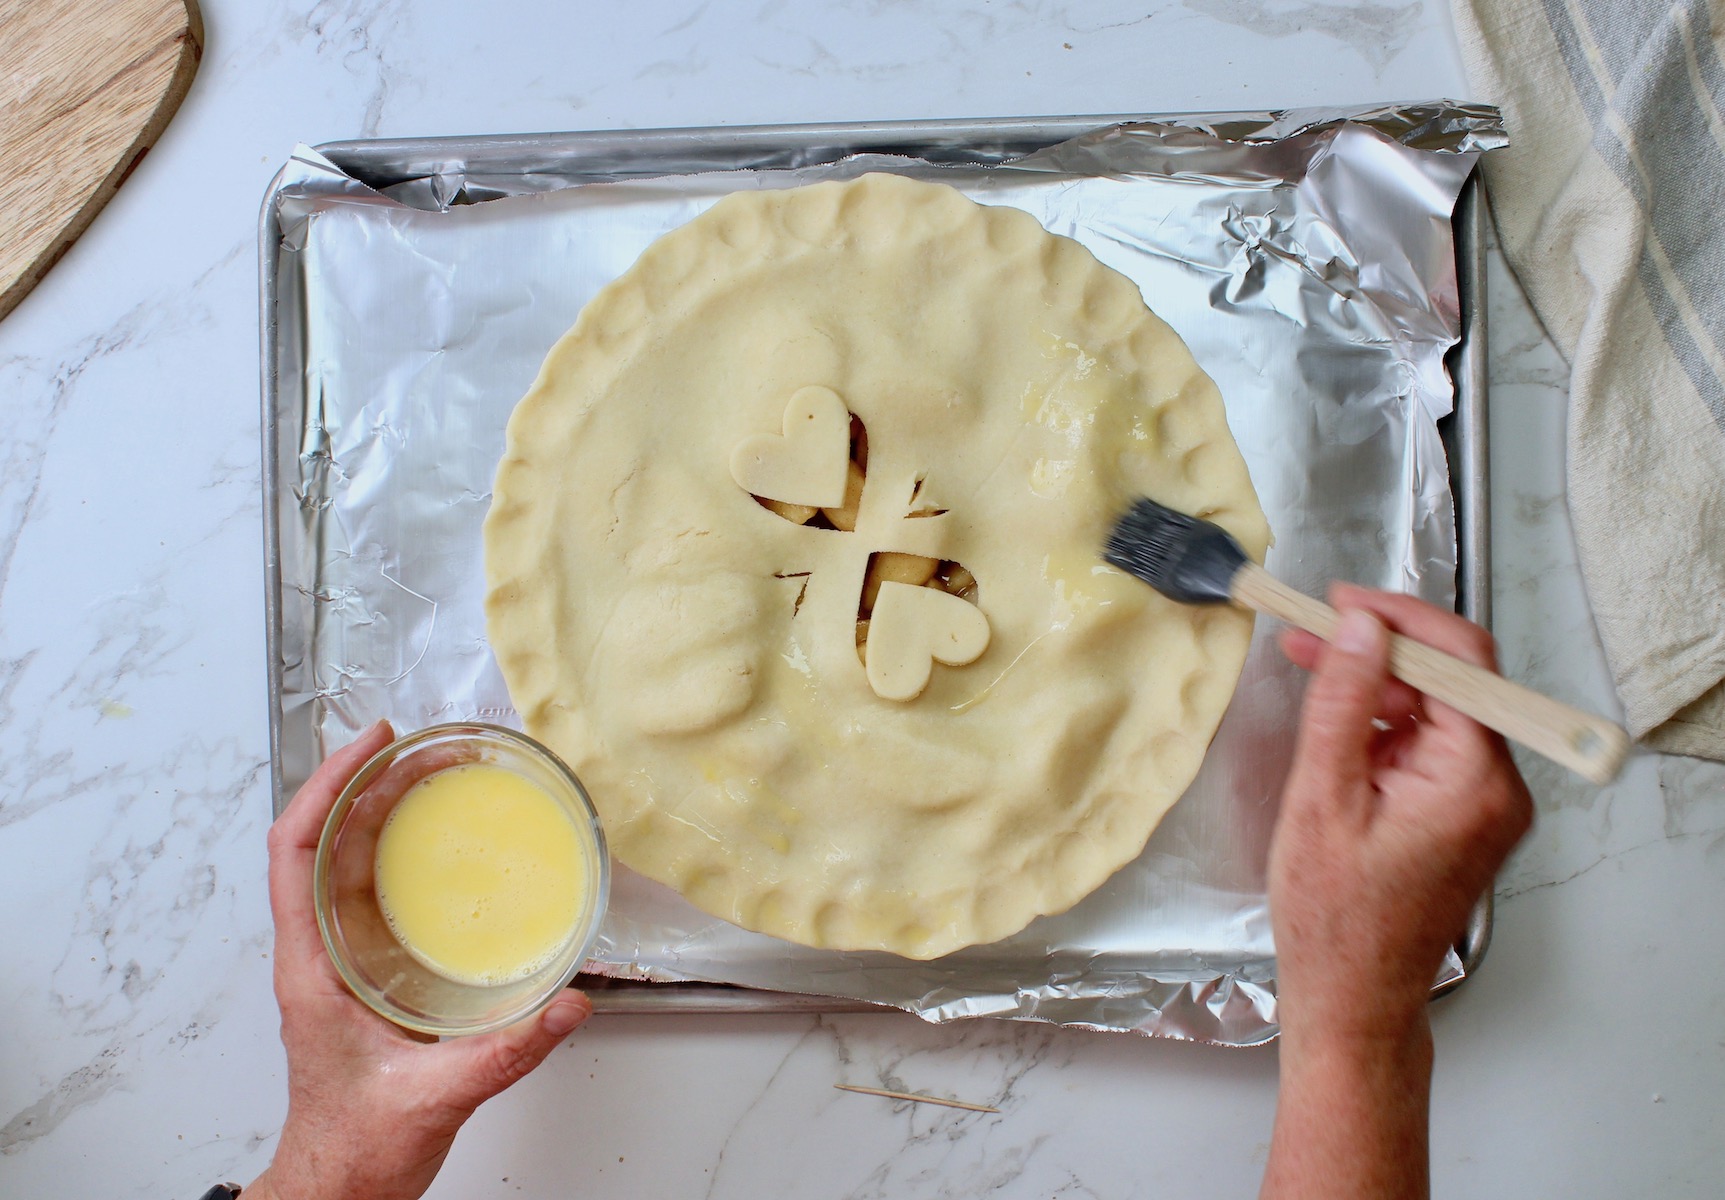
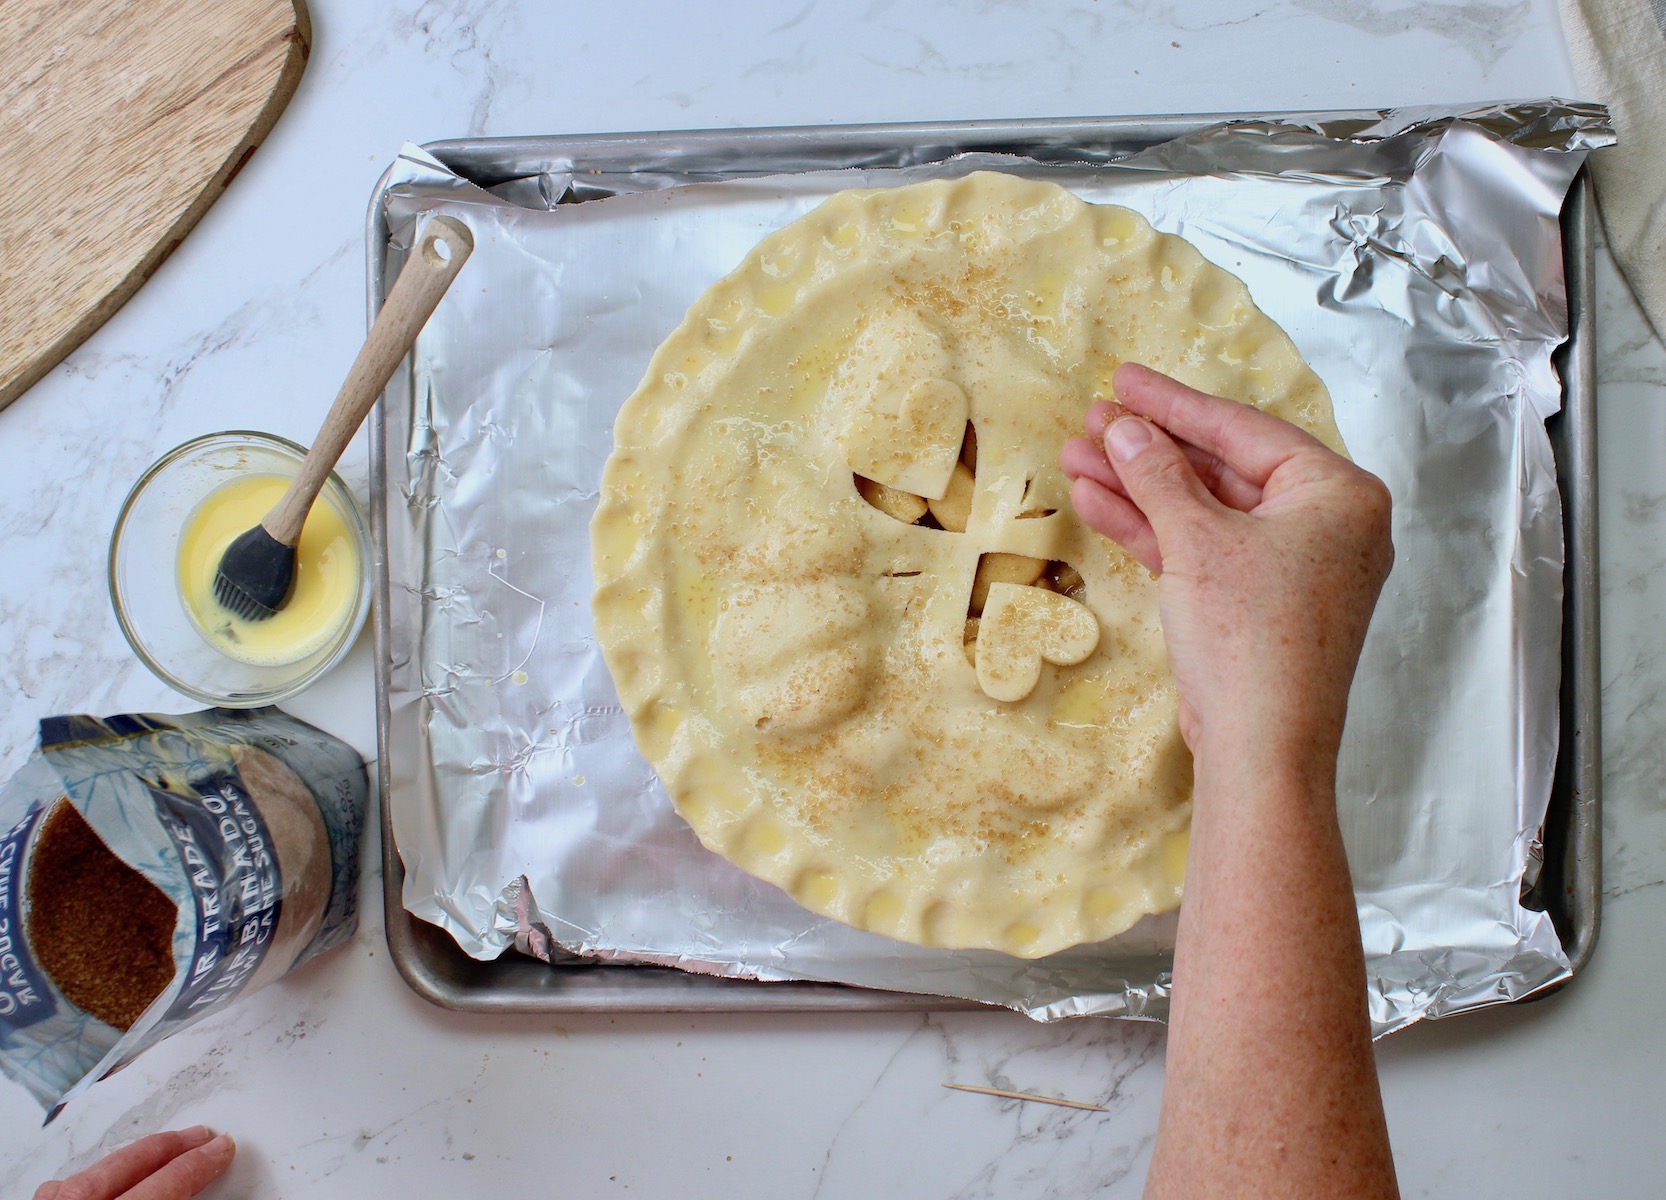
- Line a cookie sheet with foil and place the pie on it. This will be a safeguard just in case the filling bubbles over as it cooks. Brush the top of the pie crust with a combo of beaten egg and little water to encourage browning. Sprinkle with coarse sugar, if desired.
- Bake according to your specific pie recipe or pie filling instructions. I typically bake my pies at 350℉, unless otherwise directed.
Notes
You can make this pie crust dairy free by swapping the butter for a vegan butter like Earth Balance buttery spread. Another good one is Country Crock Plant butter sticks - which are easier to shred with a box grater.
And you can replace the cream with a non-dairy milk such as cashew milk or coconut milk.
How to Shape a Pie
My gluten free pie crust is so smooth and elastic, it's really easy to shape into a perfect pie. If you're not a very experienced pie baker (yet), these tips will help you make a beautiful pie with ease.
Double-Crust Pie Instructions
step 1
step 2
step 3
step 4
step 5
step 6
step 7
step 8
step 9
step 10
step 11
step 12
For a pie that has a bottom crust and a top crust, (like apple pie, or other fruit pies), follow these instructions -
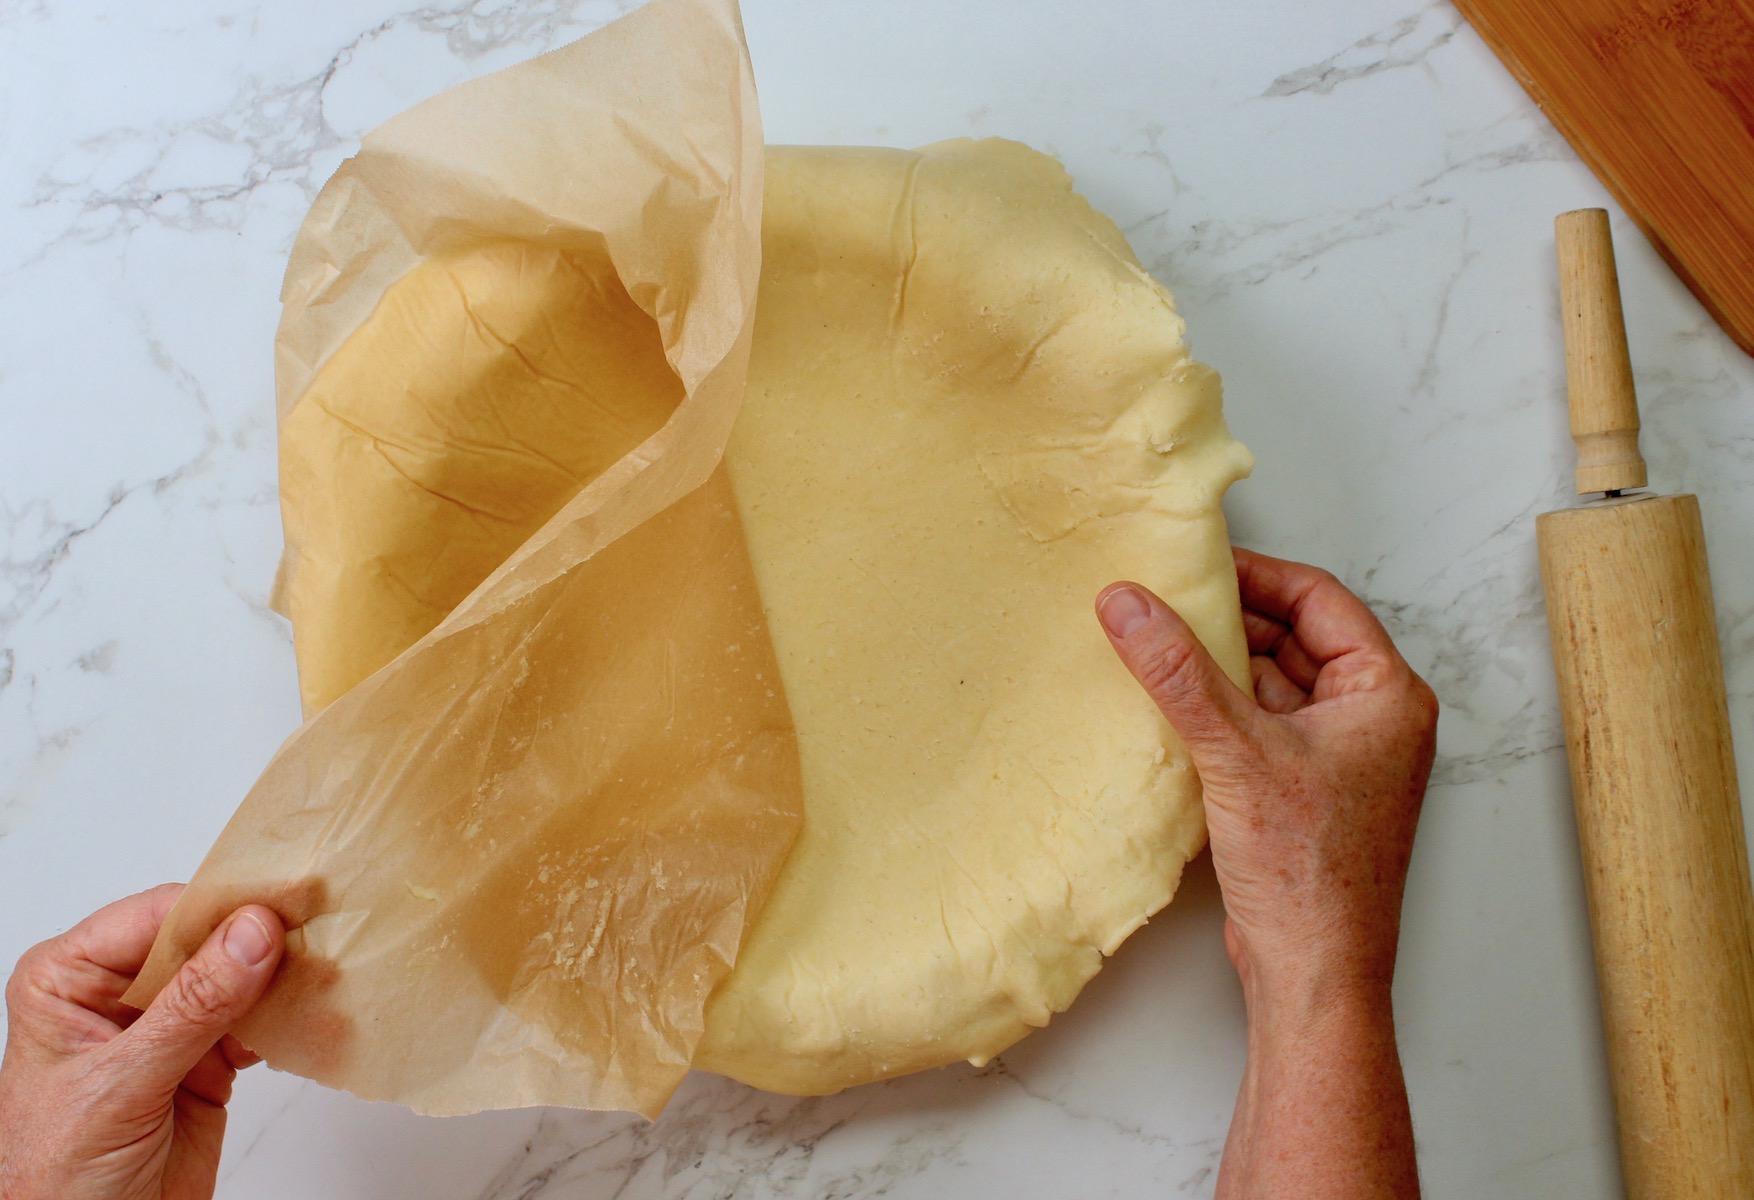
- Roll out ½ of the dough ball between 2 pieces of parchment paper. You may need to sprinkle a little flour over the dough to keep it from sticking.
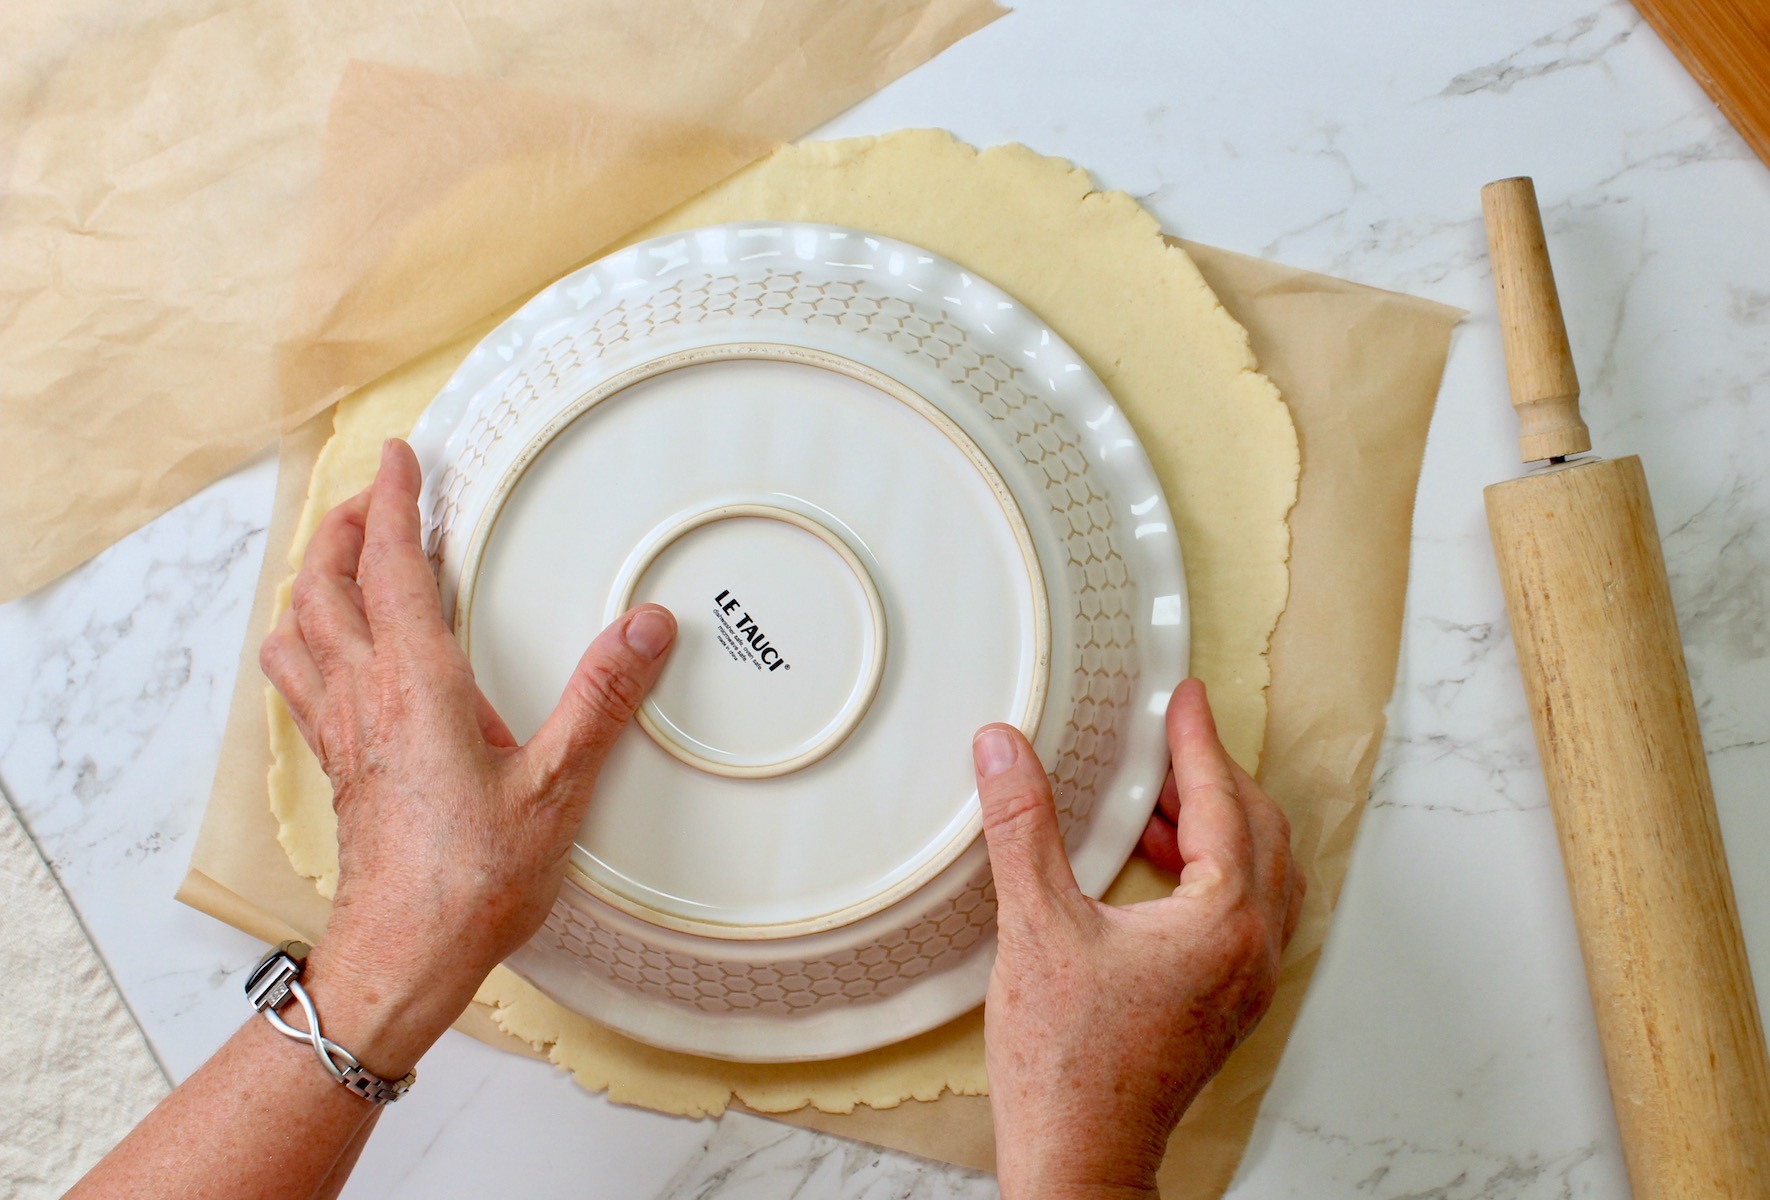
- Peel off one of the pieces of parchment paper and center the pie pan over it.
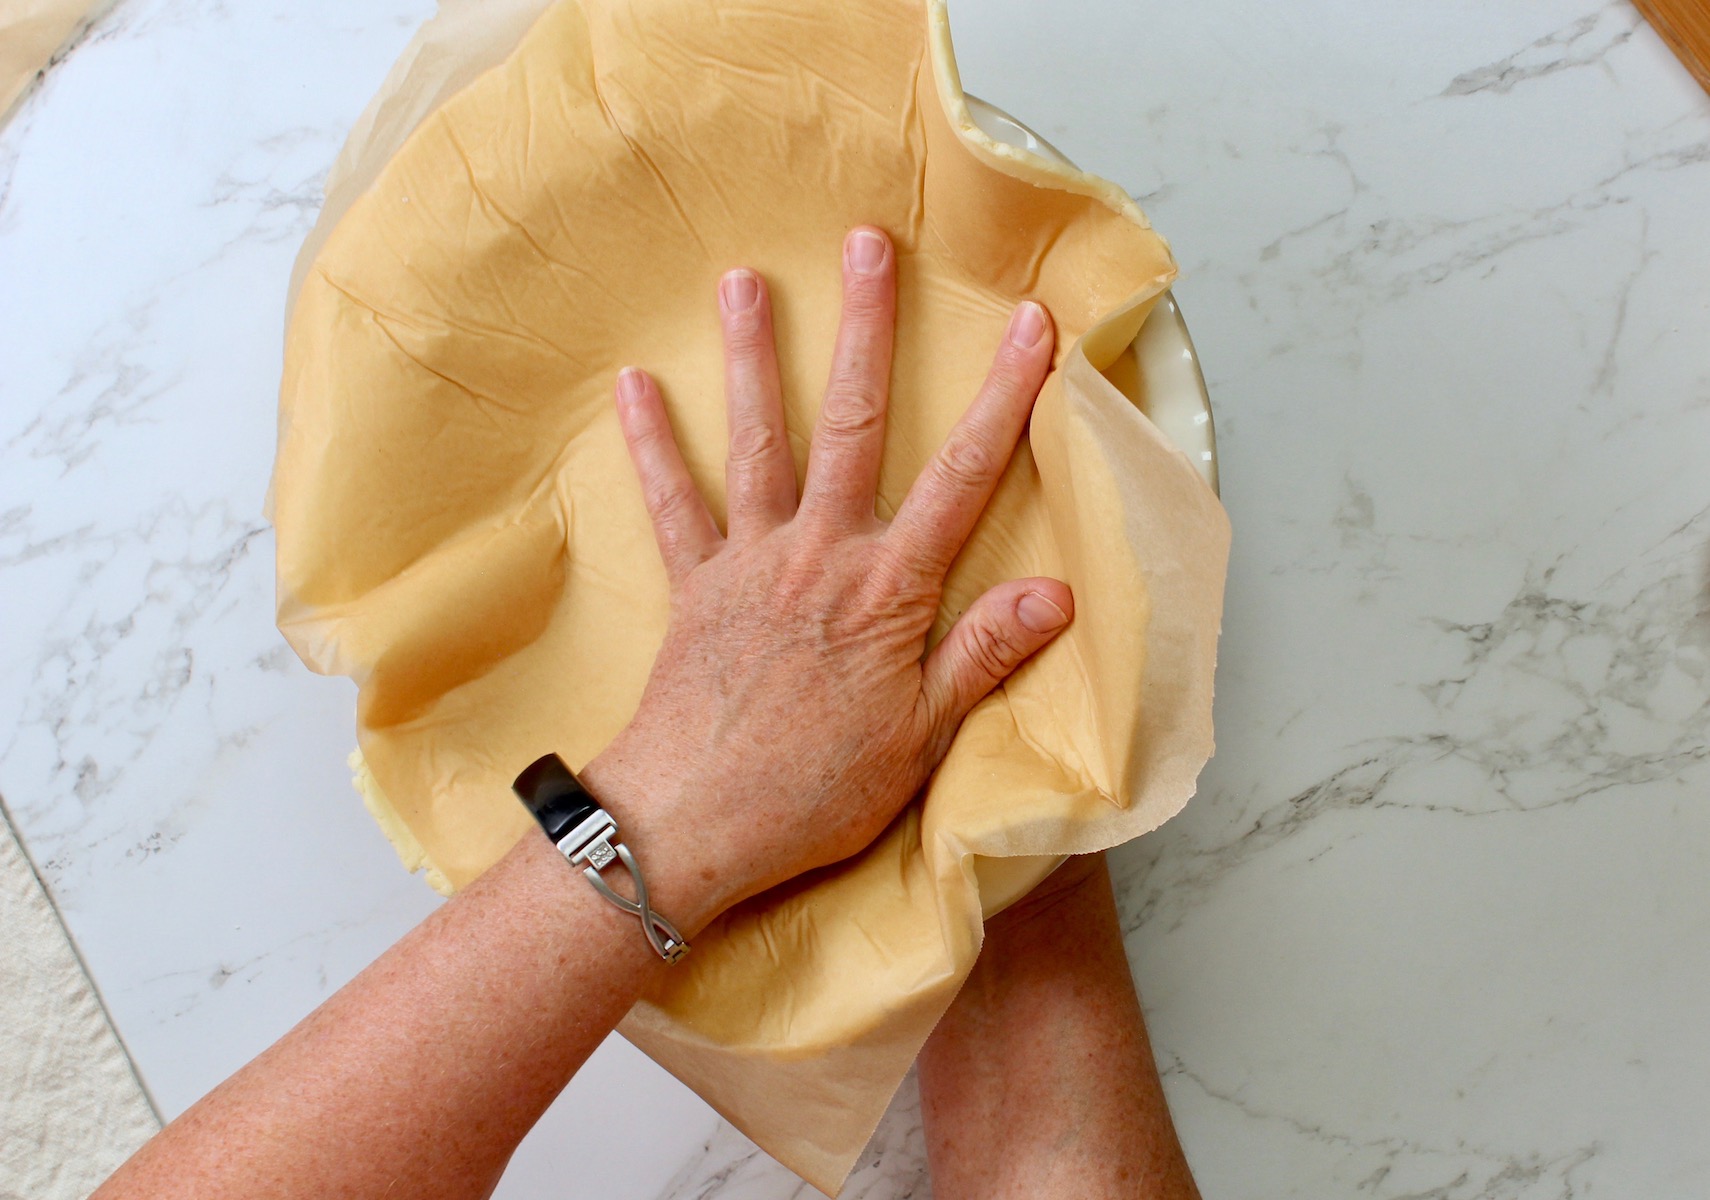
- Slip your hand, or a thin flexible cutting mat under it and flip it over.
- Peel off the other piece of parchment paper.
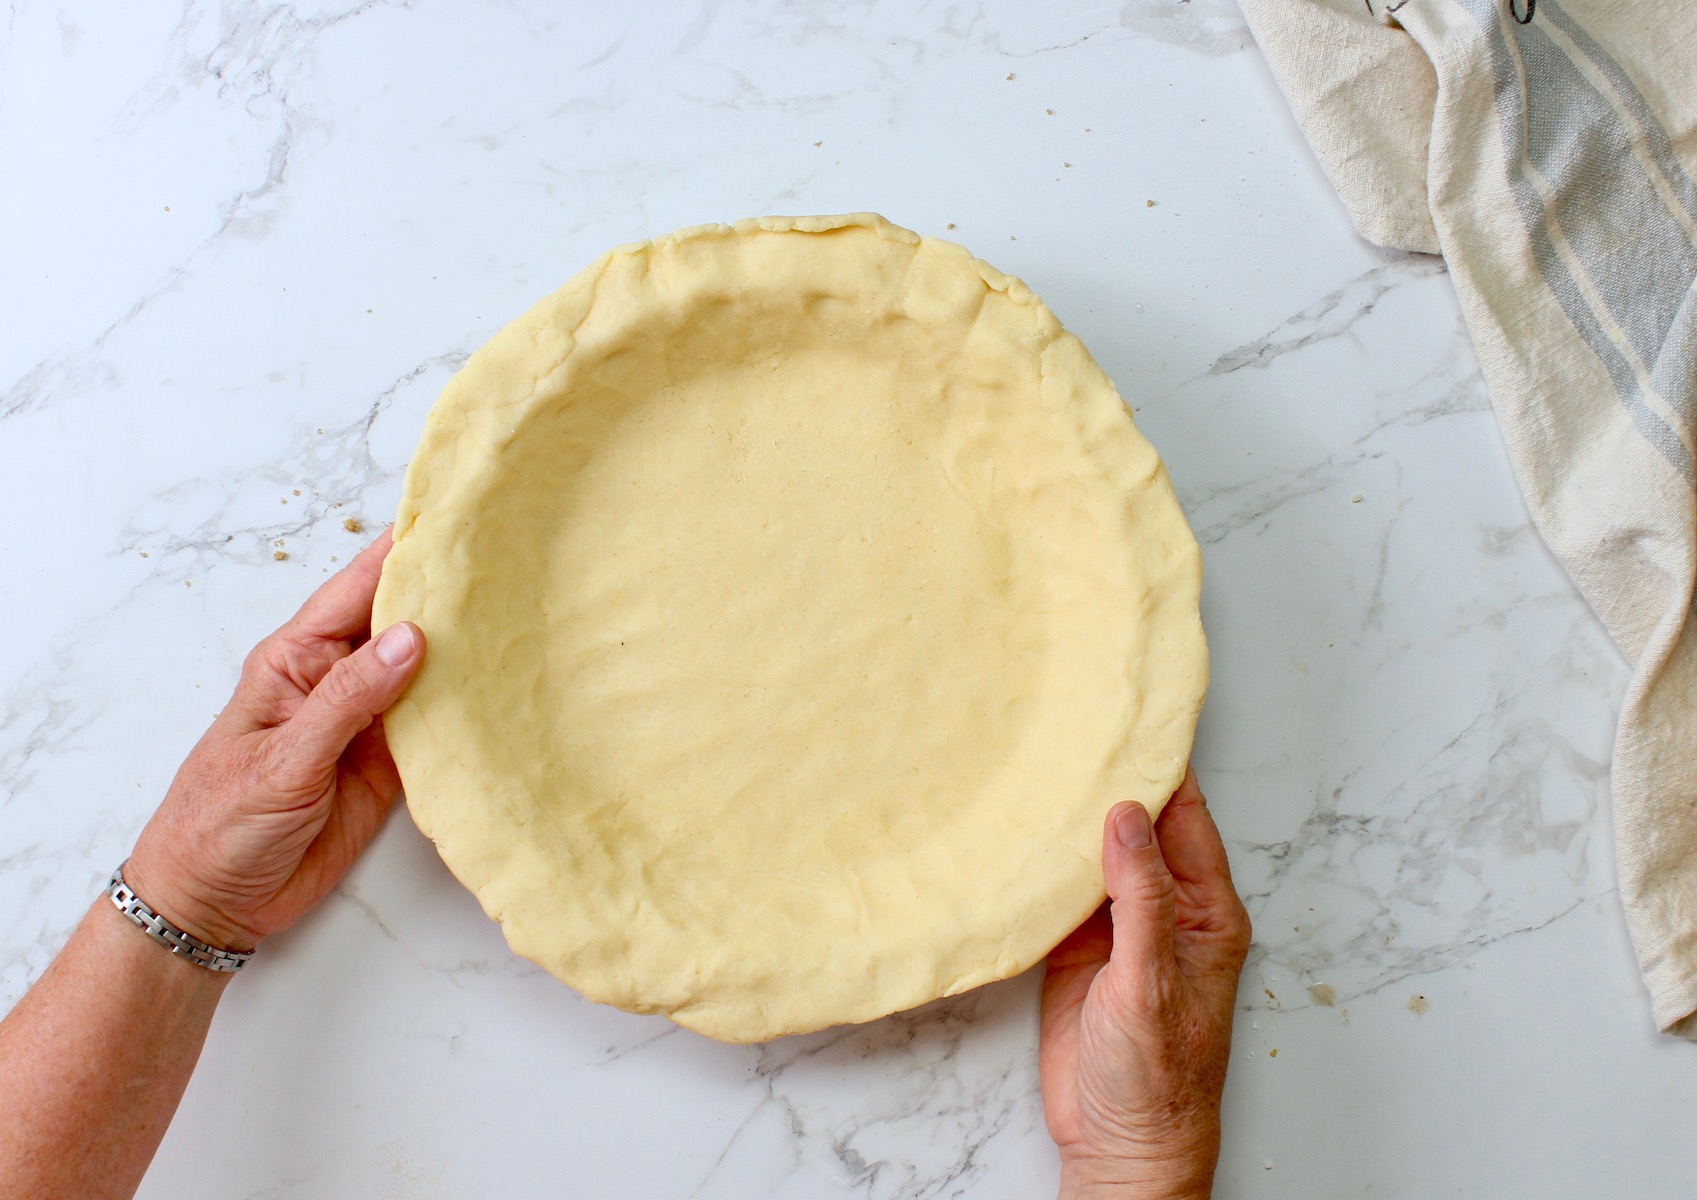
- Gently press the dough into the pan with your fingers.
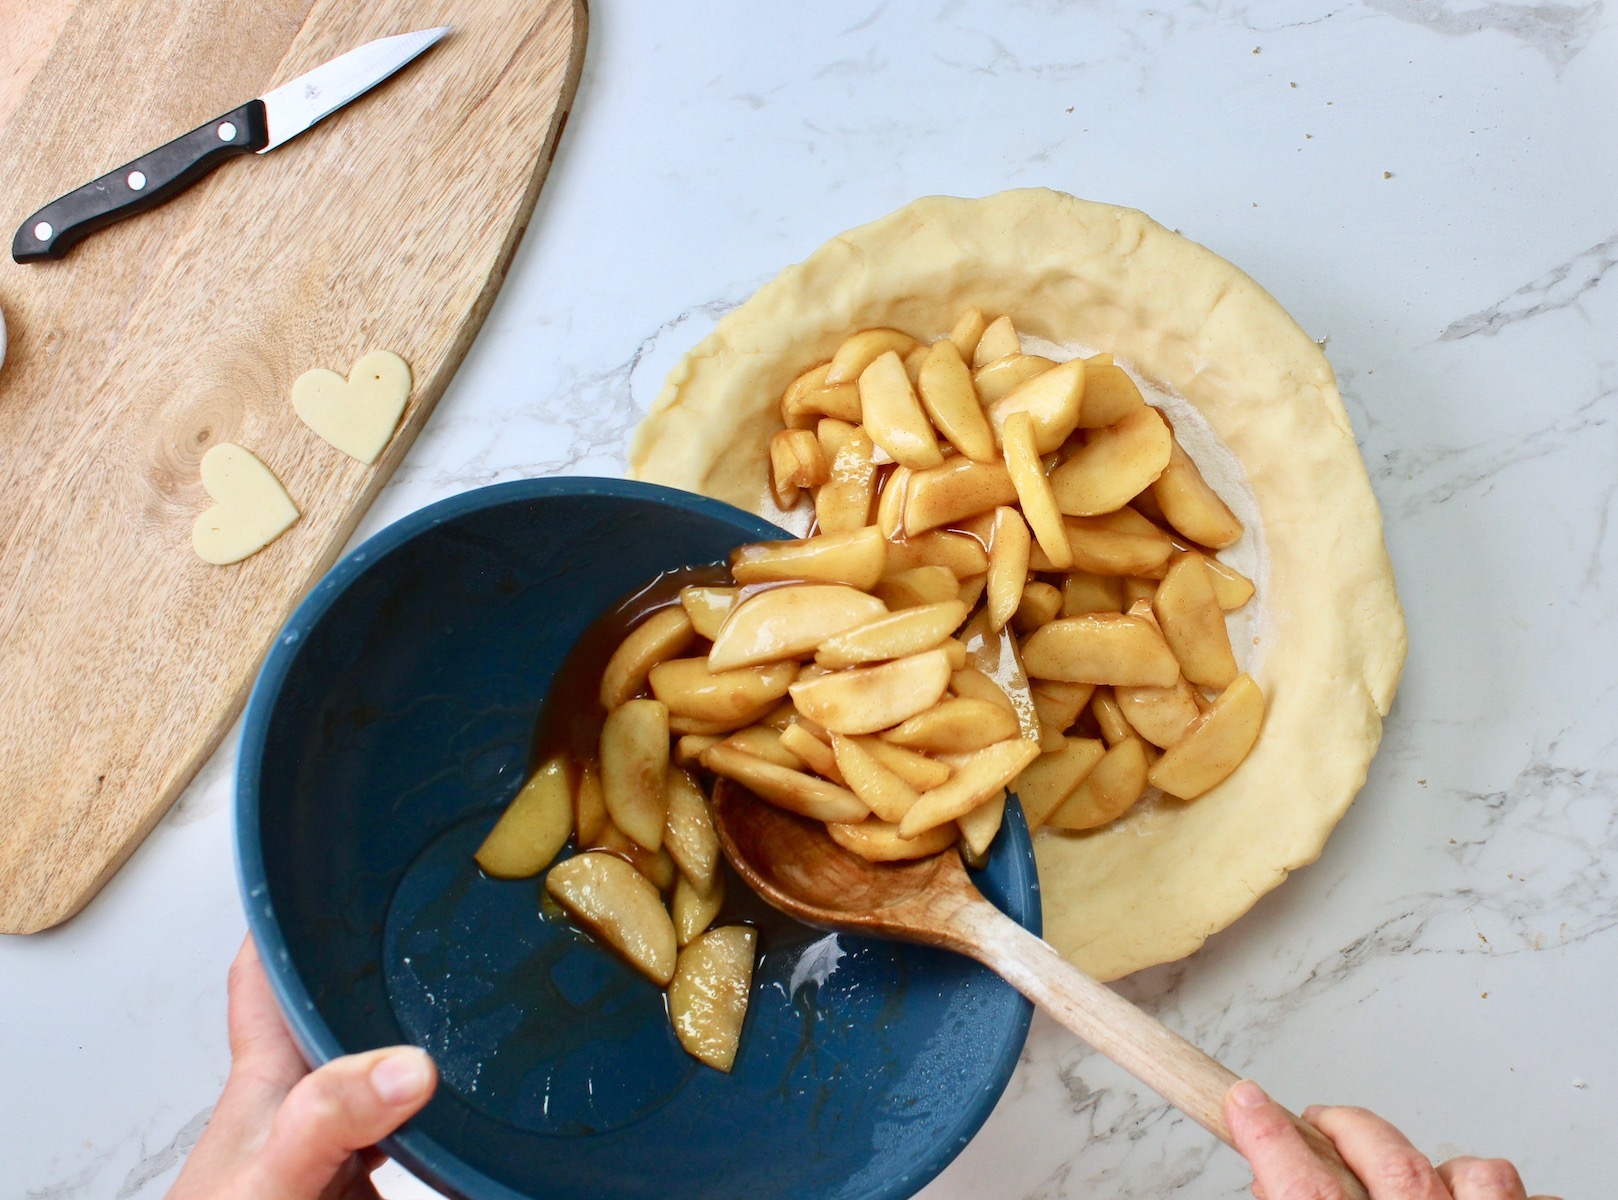
- Add the filling (like apple pie filling, for example).
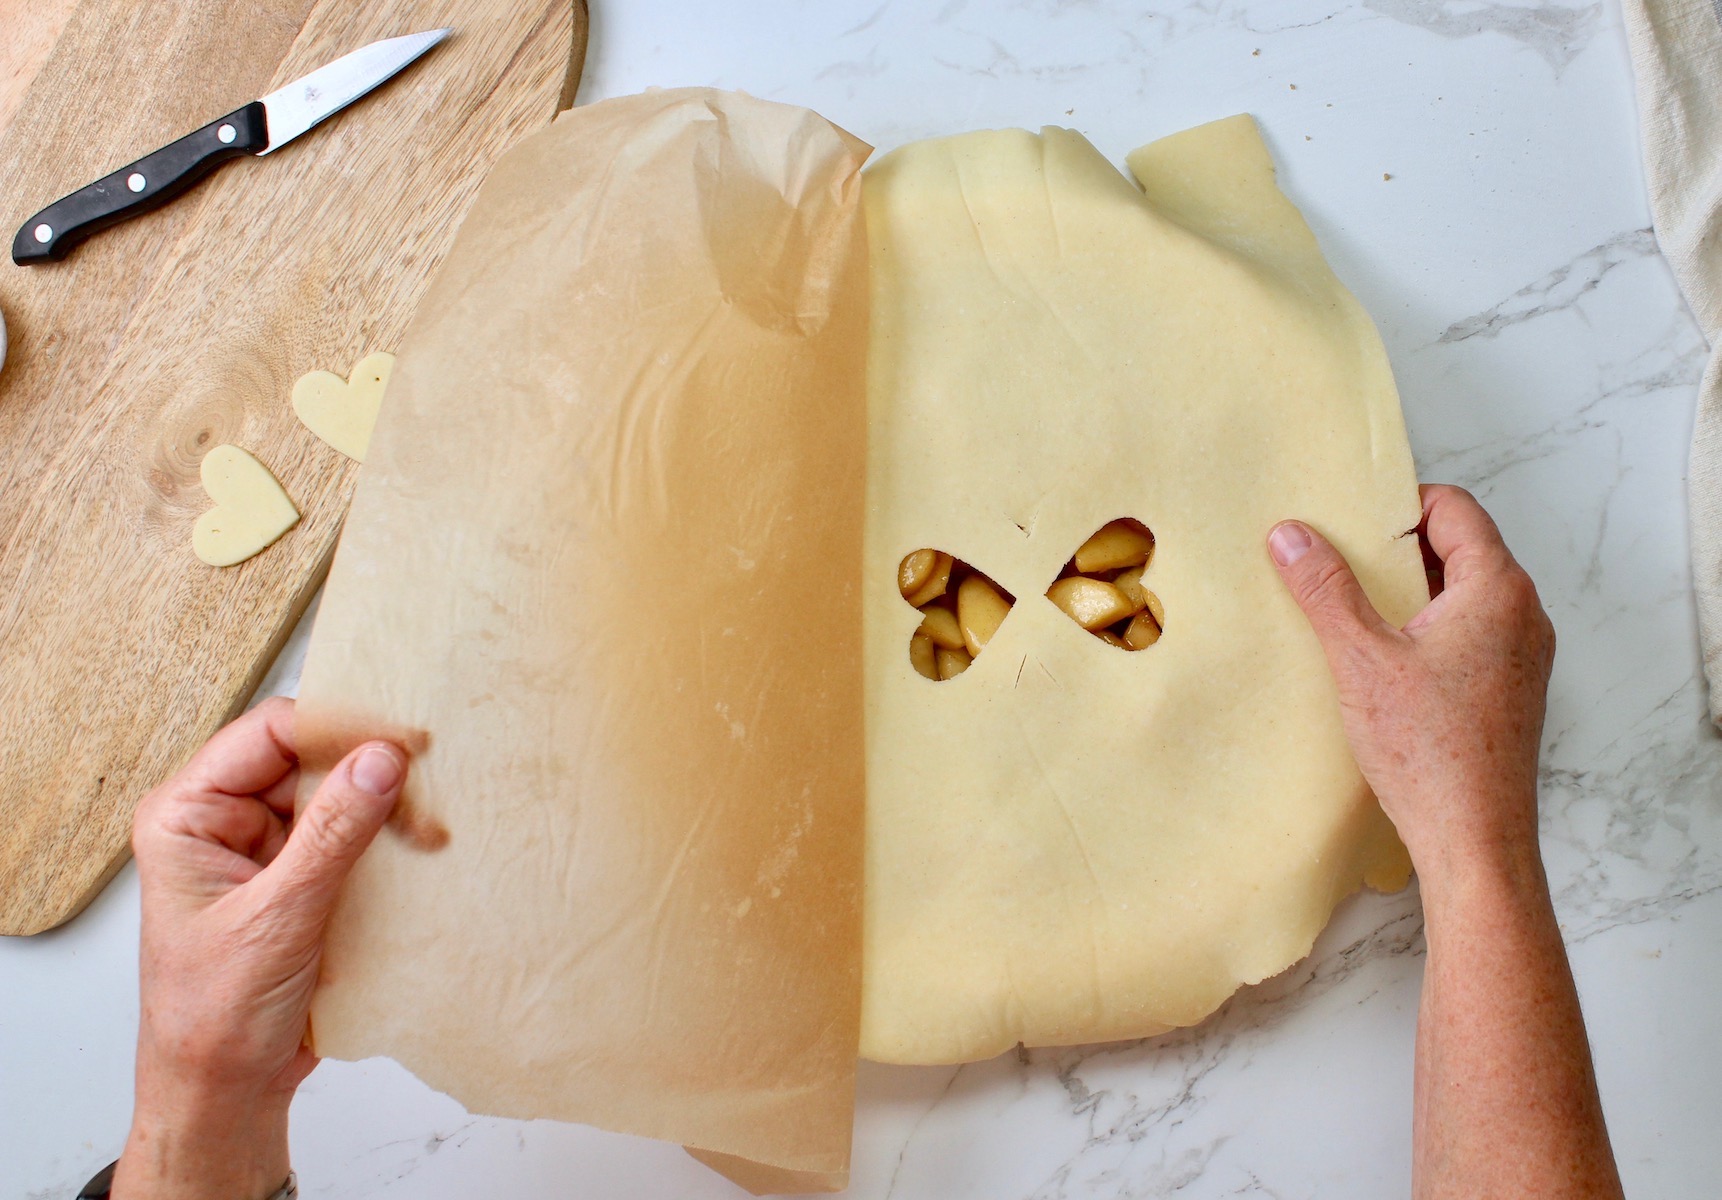
- Roll out the top crust the same way you did the bottom crust, peel away one sheet of parchment, and cut out some vents. These can be slashes with a sharp knife, or small shapes cut with a cookie cutter.
- Now holding on to the parchment, flip the top crust over the filled pie and peel away the parchment paper. What was the bottom of the crust when you were rolling it out, is now the top (if that helps 🙂
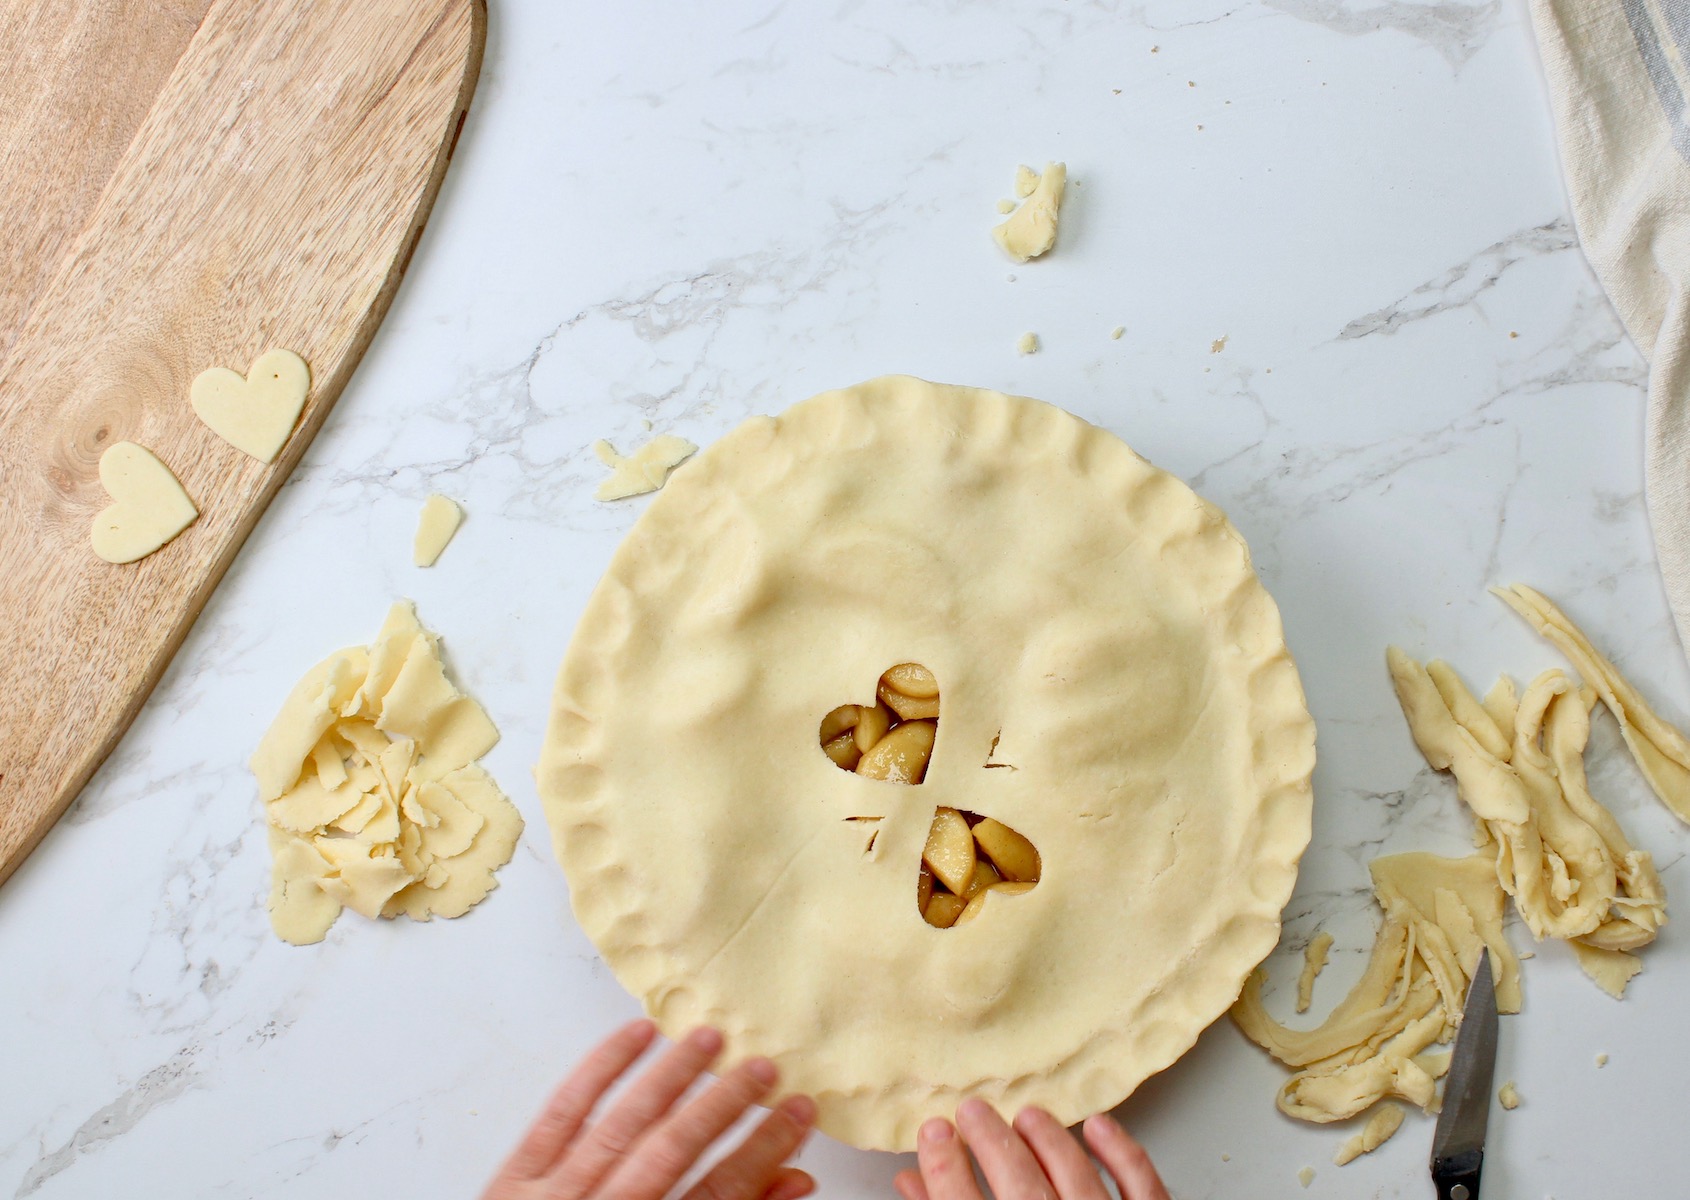
- Trim off the excess dough with your knife.Seal the bottom and top crusts together by crimping the edges with your fingers.
- Place on a cookie sheet covered with foil to catch any filling if it bubbles over. Brush with beaten egg and a little water. This will help to brown the crust as it bakes.
- Sprinkle it with some coarse sugar. This is optional, but it looks and tastes so good!
- Check with the specific pie recipe you're following and bake according to the instructions in the recipe.
Single Crust Instructions
This recipe will make 2 single crust pies. Here are my tips for a crust that you bake first then fill later (like for cream pies, strawberry pie, etc.):
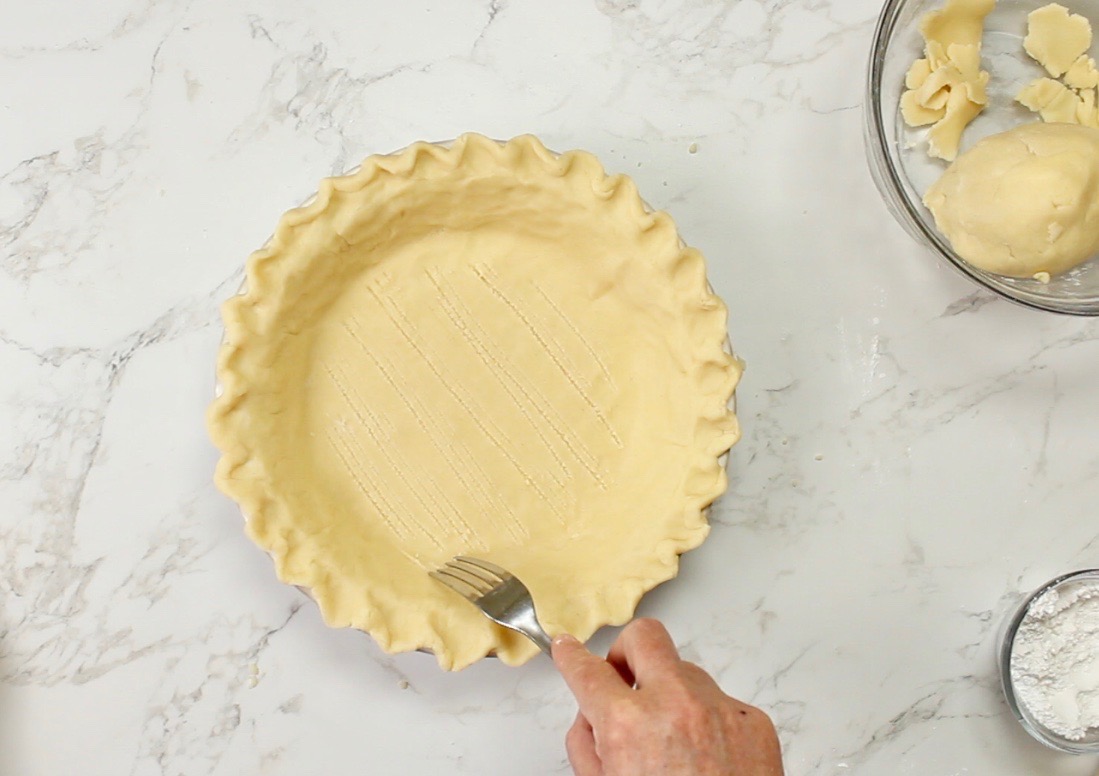
score the dough
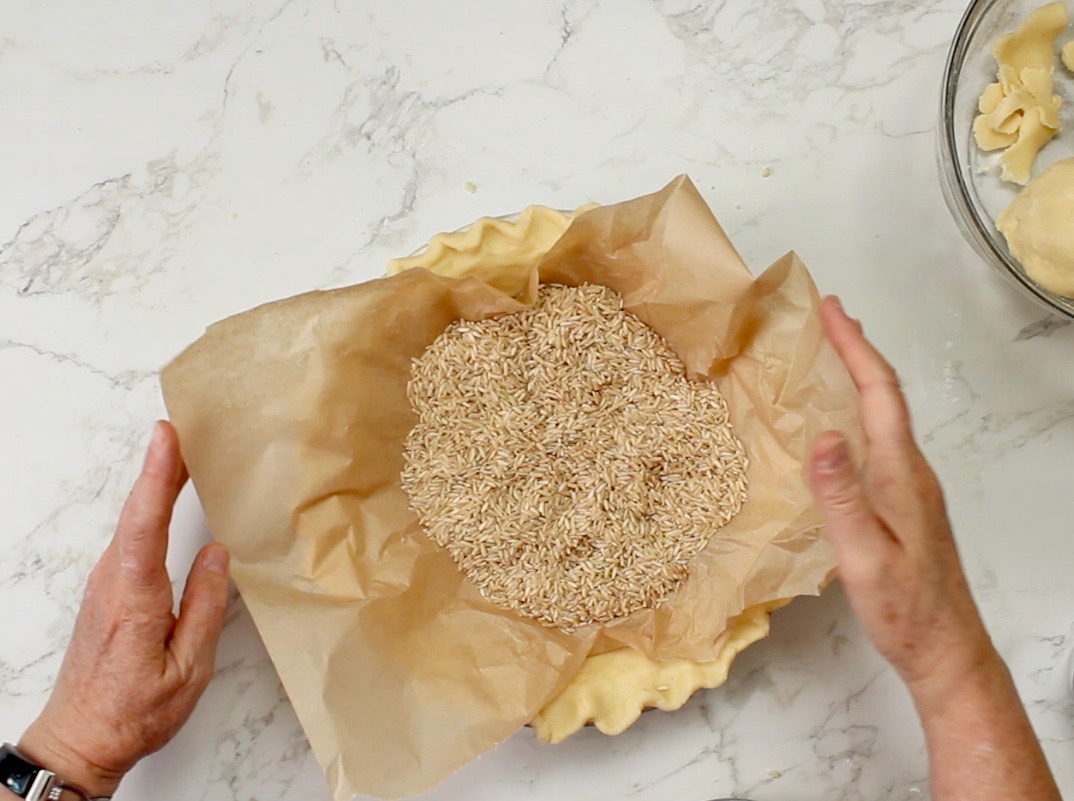
using dry rice as pie weight
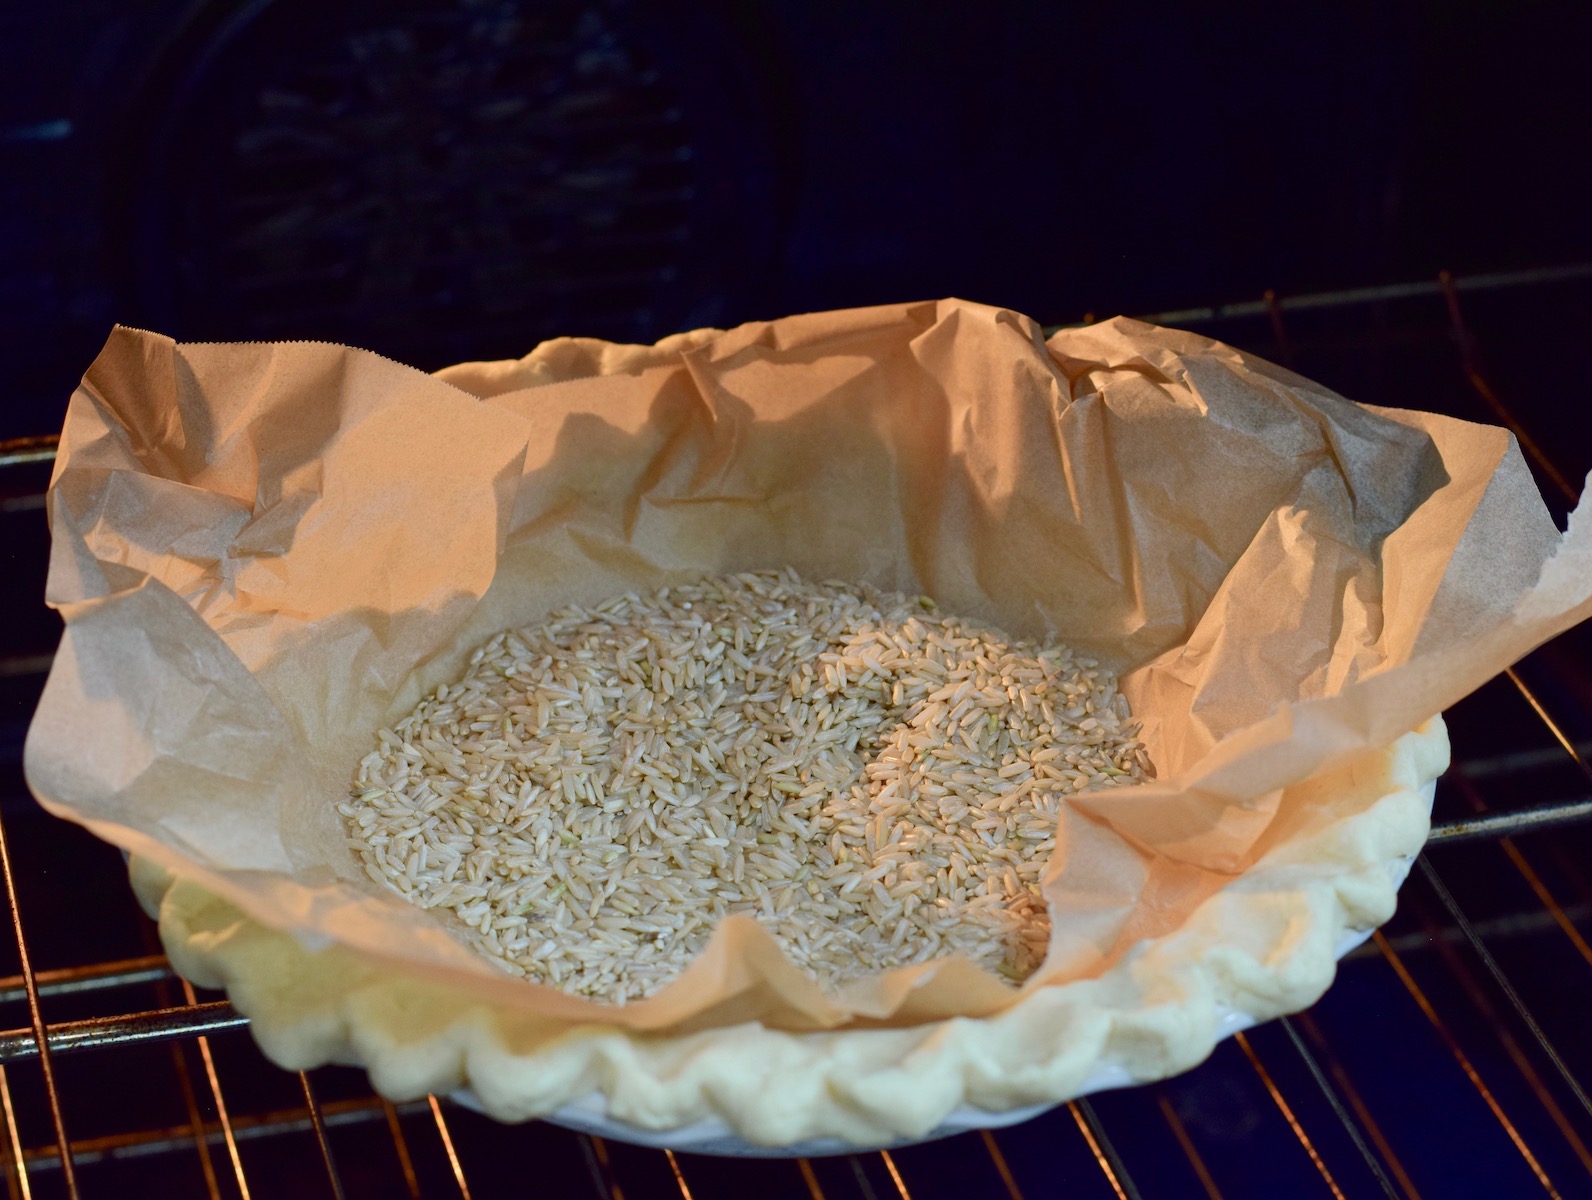
bake with rice in place
- Roll out and shape the bottom crust as described above.
- Line the pan with dough and then score it with the tines of a fork. Don't poke through, just drag the fork along leaving score lines. This will help keep it from puffing up as it bakes, but won't leave holes that could cause filling to leak out.
- You can also line the crust with parchment paper, and fill it with some dry rice. The weight of the rice will keep the crust flat as it bakes.
- Bake as usual, then take the parchment out about halfway through the baking time so the crust can brown.
Note: For single-crust pies that have the crust and filling baked together (like pumpkin pie or pecan pie), roll out the crust as shown above. There's no need to score the pastry dough once it's been put in the pie plate. The pie filling will be added before it goes into the oven, and that will act as pie weights.
Miz Helen says
Hi Kristie,
This looks like a great crust. Hope you are having a great day and thanks so much for sharing this awesome post with Full Plate Thursday.
Come Back Soon!
Miz Helen
ashley ramsey says
This looks easy and so delicious! I need more gluten free recipes in my life.
Caroline @ A Whole New Twist says
I'm so excited to try this! I don't often eat grains, but when I do, I try to make them gluten free. I have not tried a GF pie crust yet, but I'm excited to try yours, especially now with all the gorgeous summer fruits in season. I think peach pie may be first attempt, wish me luck!
beneficialbento says
Good luck! I love a good peach pie - and I'd love to hear how yours turned out!